- Why MongoDB? :
- Lets evaluate MongoDB on CAP theorem to assert ‘Why MongoDB’
- Partition tolerance is a MUST in Bigdata scenarios as well as where we are using humongous data – MongoDB is good as it supports sharding, can be scaled-out easily
- Consistency Vs Availability – MongoDB favors consistency over availability. Mongo DB just like Hbase has a Master so data is consistent but what if the master goes down? Well the secondary nodes can be elevated to master

- MongoDB does not have a schema and is not relational so no expensive joins unlike relational databases like MySQL, MariaDB
- It does not even need a primary key unlike Cassandra as it automatically add a GUID to each row
- Its JSON based so very fast:
-
{ _id: ObjectId(7df78ad8902c) movie_title: 'Speed', movie_description: 'Its a action drama movie',
 ratings: [ { userName:'Mohd Naeem', ratingMessage: 'This a the best action movie', dateCreated: new Date(2018,1,16,20,35), rating: 5 }, { user:'Maria', message: 'Really liked this movie a lot', dateCreated: new Date(2018,1,16,20,45), rating: 4 } ]
}
-
- Lets evaluate MongoDB on CAP theorem to assert ‘Why MongoDB’
- MongoDB Architecture:
- It consists of Database, Collections, Documents, Fields.
- It consists of a single master and many secondary nodes
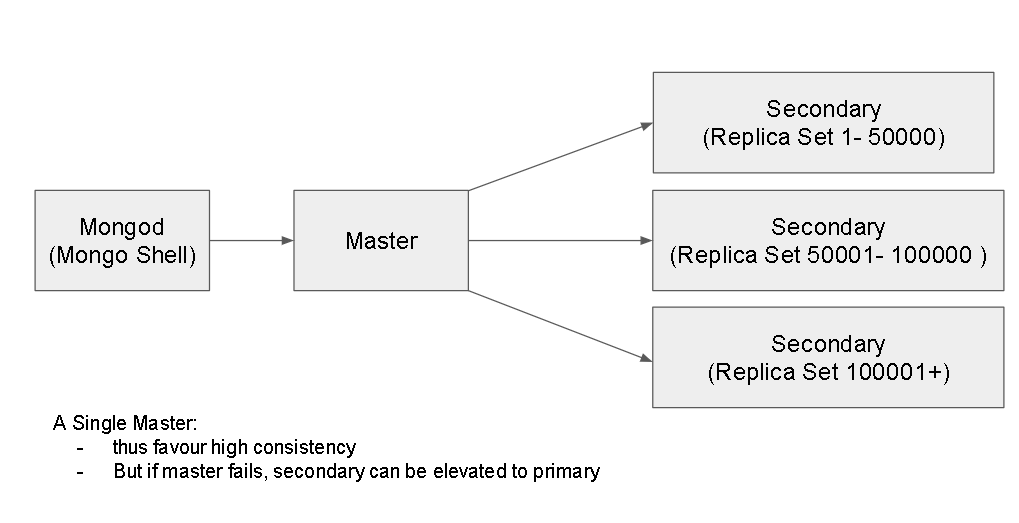
- Supports Indices and sharding( creating replica sets) based on a single index
- MongoDB Installation:
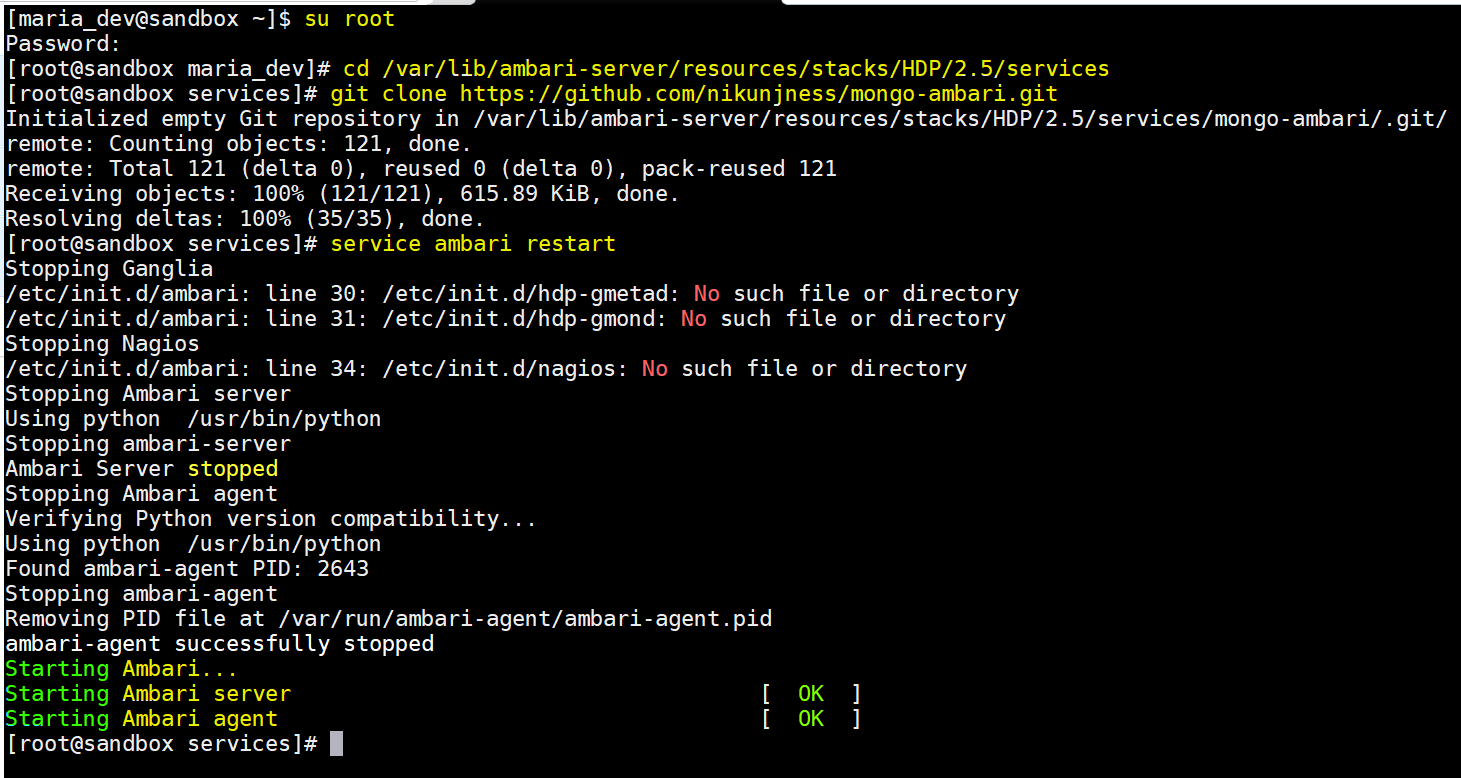
- Login to a Ambari Sandbox with ‘maria_dev’ credentials and elevate to root.
- If you are installing MongoDB on any other stack like Cloudera or Map-R or Custom Hadoop setup, then you might need to install it standalone.
- But for Hortonworks Ambari, there is already a connector which can be used to install, please follow these steps:
- change directory to –
- cd /var/lib/ambari-server/resources/stacks/HDP/2.5/services
- now execute :
- git clone https://github.com/nikunjness/mongo-ambari.git
- restart Ambari service:
- service ambari restart
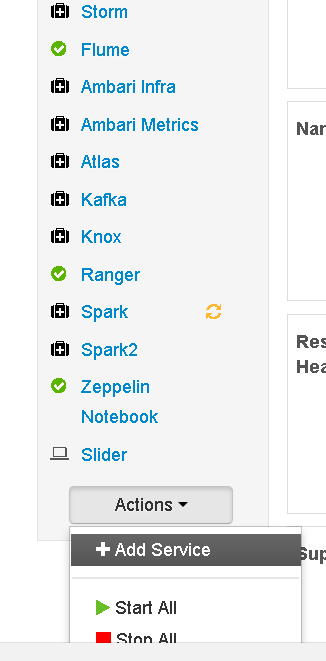
- Now login to the Ambari Dashboard:
- In the bottom left side of main Ambari Dashboard, select “Add Service” from the “Actions” drop down
- Now select “MongoDB” from the list of services and Press Next
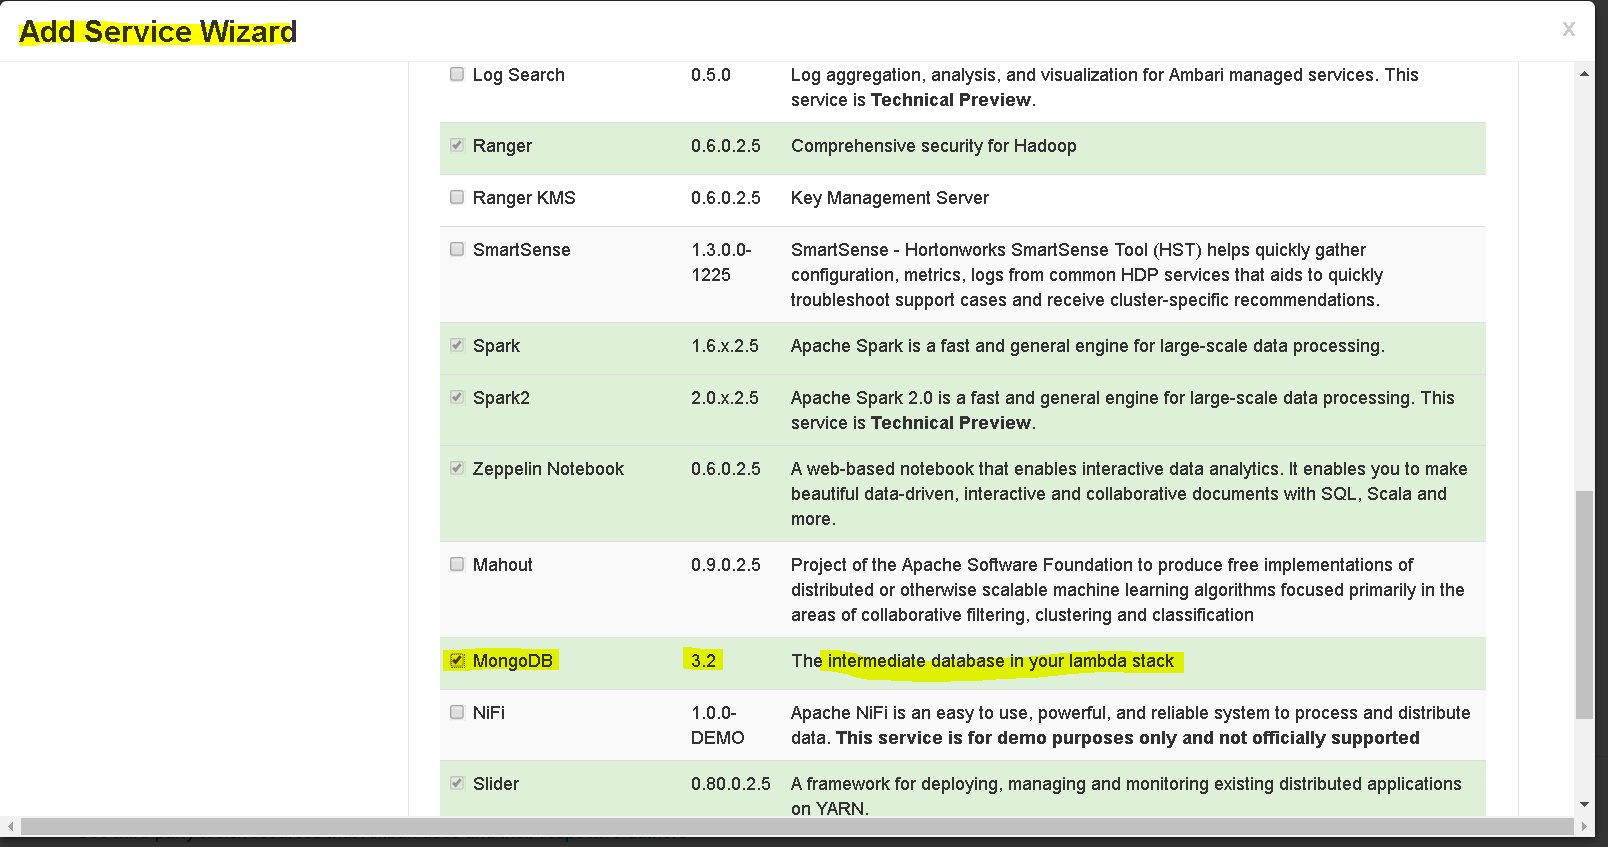
- Since we are having a 1 cluster sandbox, we will leave everything else as default in rest of the wizard but in case you have a multi cluster setup then you can selectively configure nodes.
- Keep pressing ‘Next’ and in last steps “Process Anyway” and “Deploy”. Press “Complete” once deploy succeeds.
- MongoDB is installed, up and running.
- change directory to –
- MongoDB Integration:
- Install few dependencies:
- Install pymongo – pip install pymongo
- If pip is not installed – yum -y install python-pip
- Now you are ready.
- Lets download the Python script from here —https://s3.amazonaws.com/testbucket786786/SparkMongoDBIntegration.py
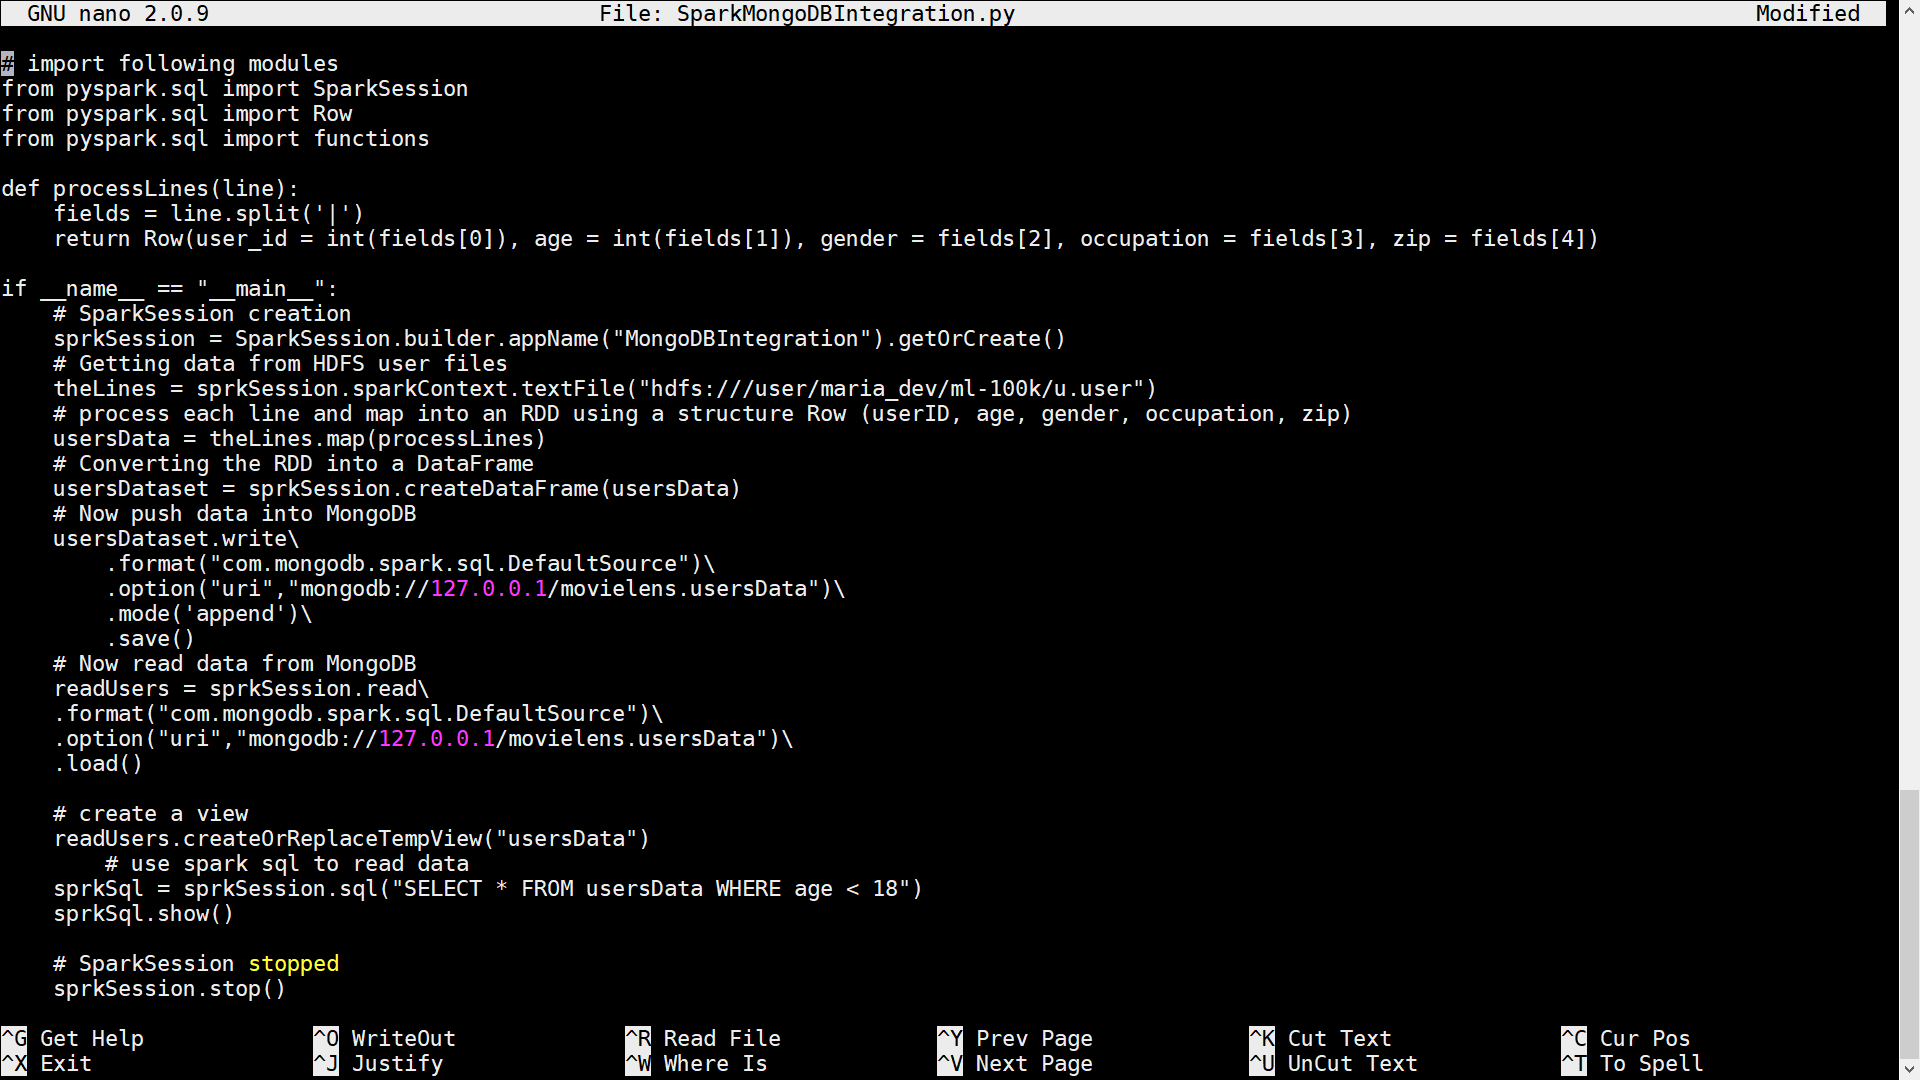
- Explanation of code:
- Code is similar to Cassandra Integration, main difference is that the driver will change from that of Cassandra to that of MongoDB.
- The below code section will create a Spark session, pull the data from HDFS, process each line to split it into a Row and then map it into an RDD and finally to a DataFrame
-
# SparkSession creation sprkSession = SparkSession.builder.appName(“MongoDBIntegration”).getOrCreate() # Getting data from HDFS user files theLines = sprkSession.sparkContext.textFile(“hdfs:///user/maria_dev/ml-100k/u.user”) # process each line and map into an RDD using a structure Row (userID, age, gender, occupation, zip) usersData = theLines.map(processLines) # Converting the RDD into a DataFrame usersDataset = sprkSession.createDataFrame(usersData)
- the save method saves data into MongoDB and load method will read data from MongoDB
# Now push data into MongoDB
usersDataset.write\
.format(“com.mongodb.spark.sql.DefaultSource“)\
.option(“uri“,”mongodb://127.0.0.1/movielens.usersData“)\
.mode(‘append’)\
.save() # Now read data from MongoDB
readUsers = sprkSession.read\
.format(“com.mongodb.spark.sql.DefaultSource“)\
.option(“uri“,”mongodb://127.0.0.1/movielens.usersData“)\
.load() - The below code will create a view and Spark SQL statement to read data
-
# create a view # create a view readUsers.createOrReplaceTempView(“usersData”) # use spark sql to read data sprkSql = sprkSession.sql(“SELECT * FROM usersData WHERE age < 18”) sprkSql.show()
- Now lets execute the script and verify data:
- set Spark versions to 2 :
- export SPARK_MAJOR_VERSION=2
- Execute now ( see the new mongo spark connector) :
- spark-submit –packages org.mongodb.spark:mongo-spark-connector_2.11:2.0.0 SparkMongoDBIntegration.py
-
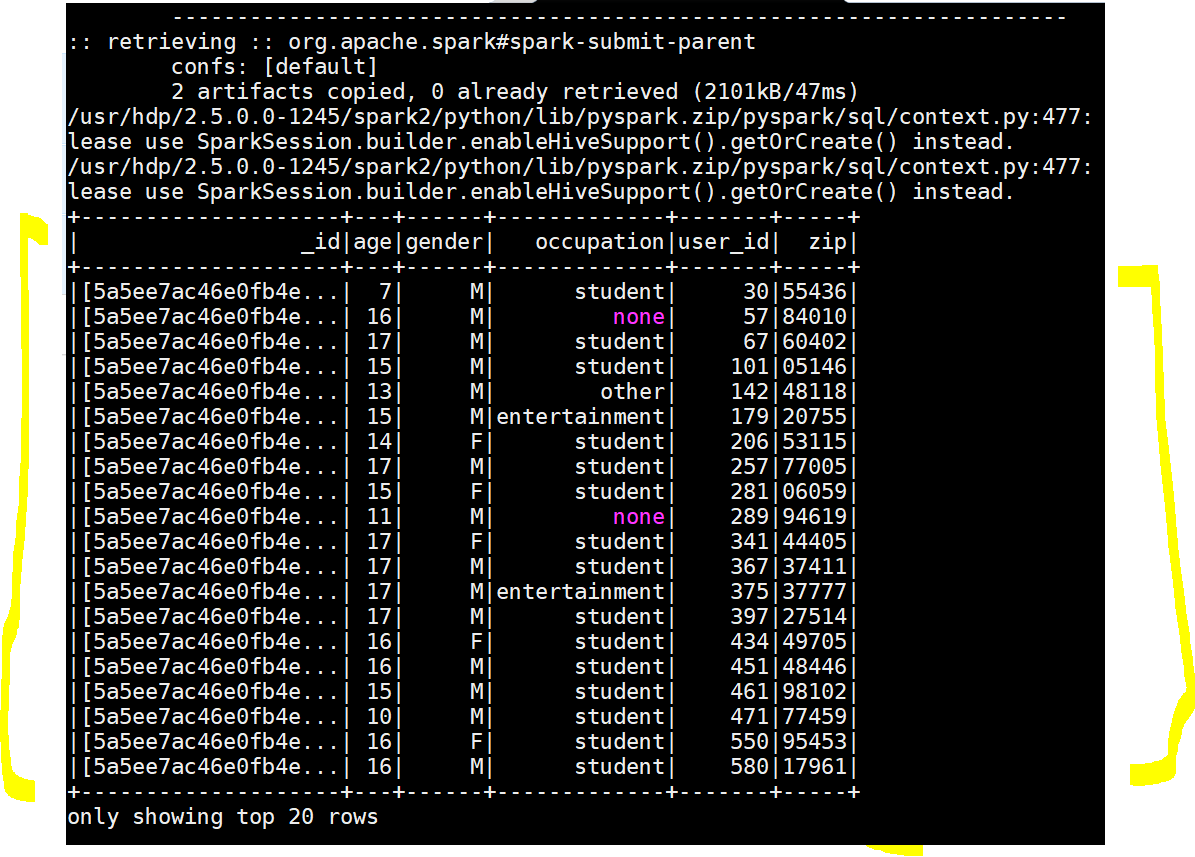
Yay!!!, MongoDB Spark Integration succeeded - Lets verify in MongoDB command line too :
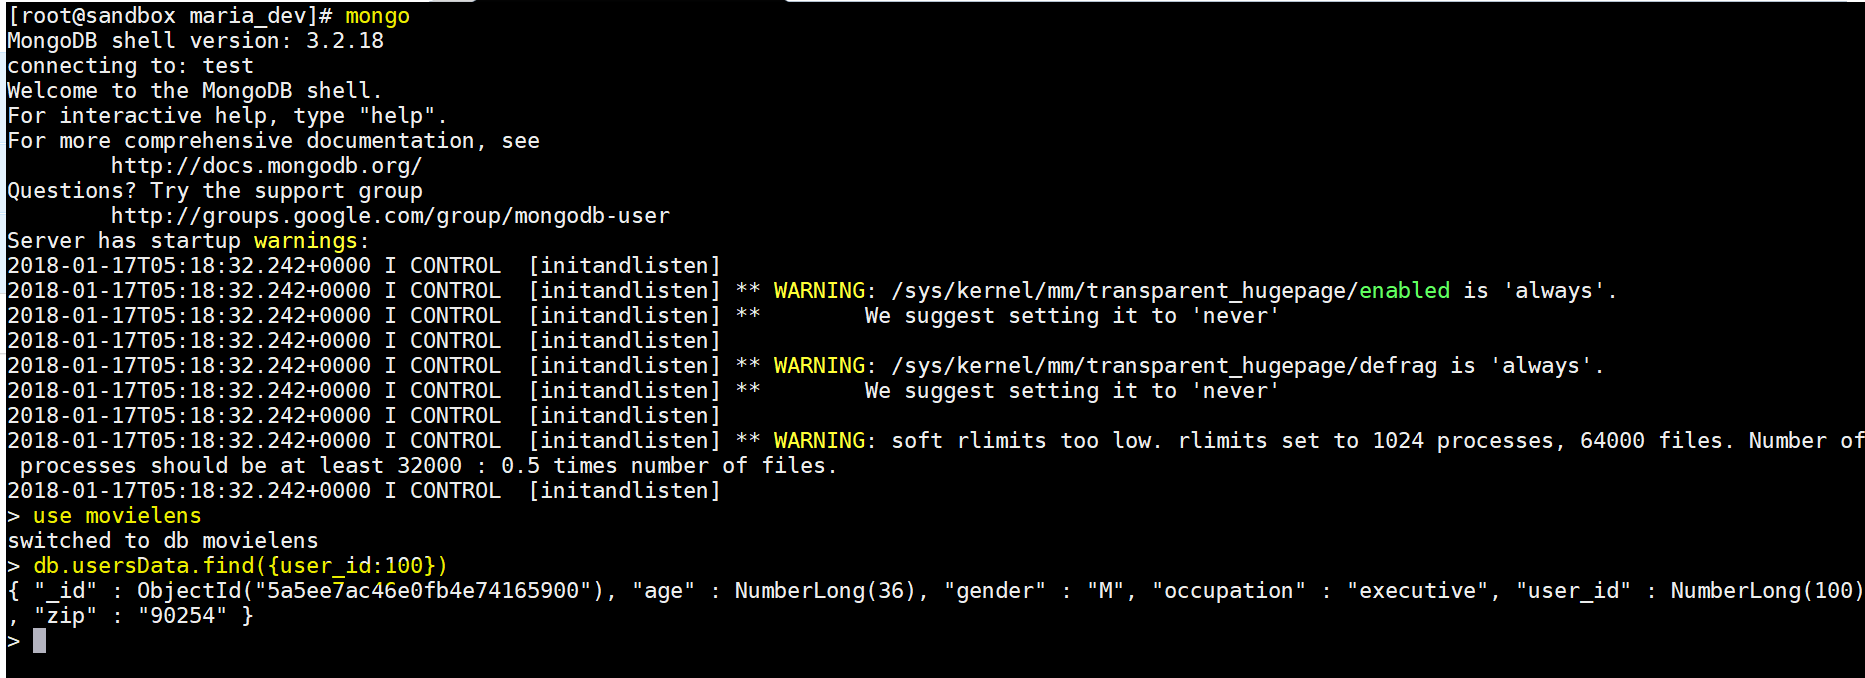
- To run MongoDB command line – mongo
- To use a database : use movielens
- To find a row( db.collectioname.find(condition) : db.usersData.find({user_id:100})
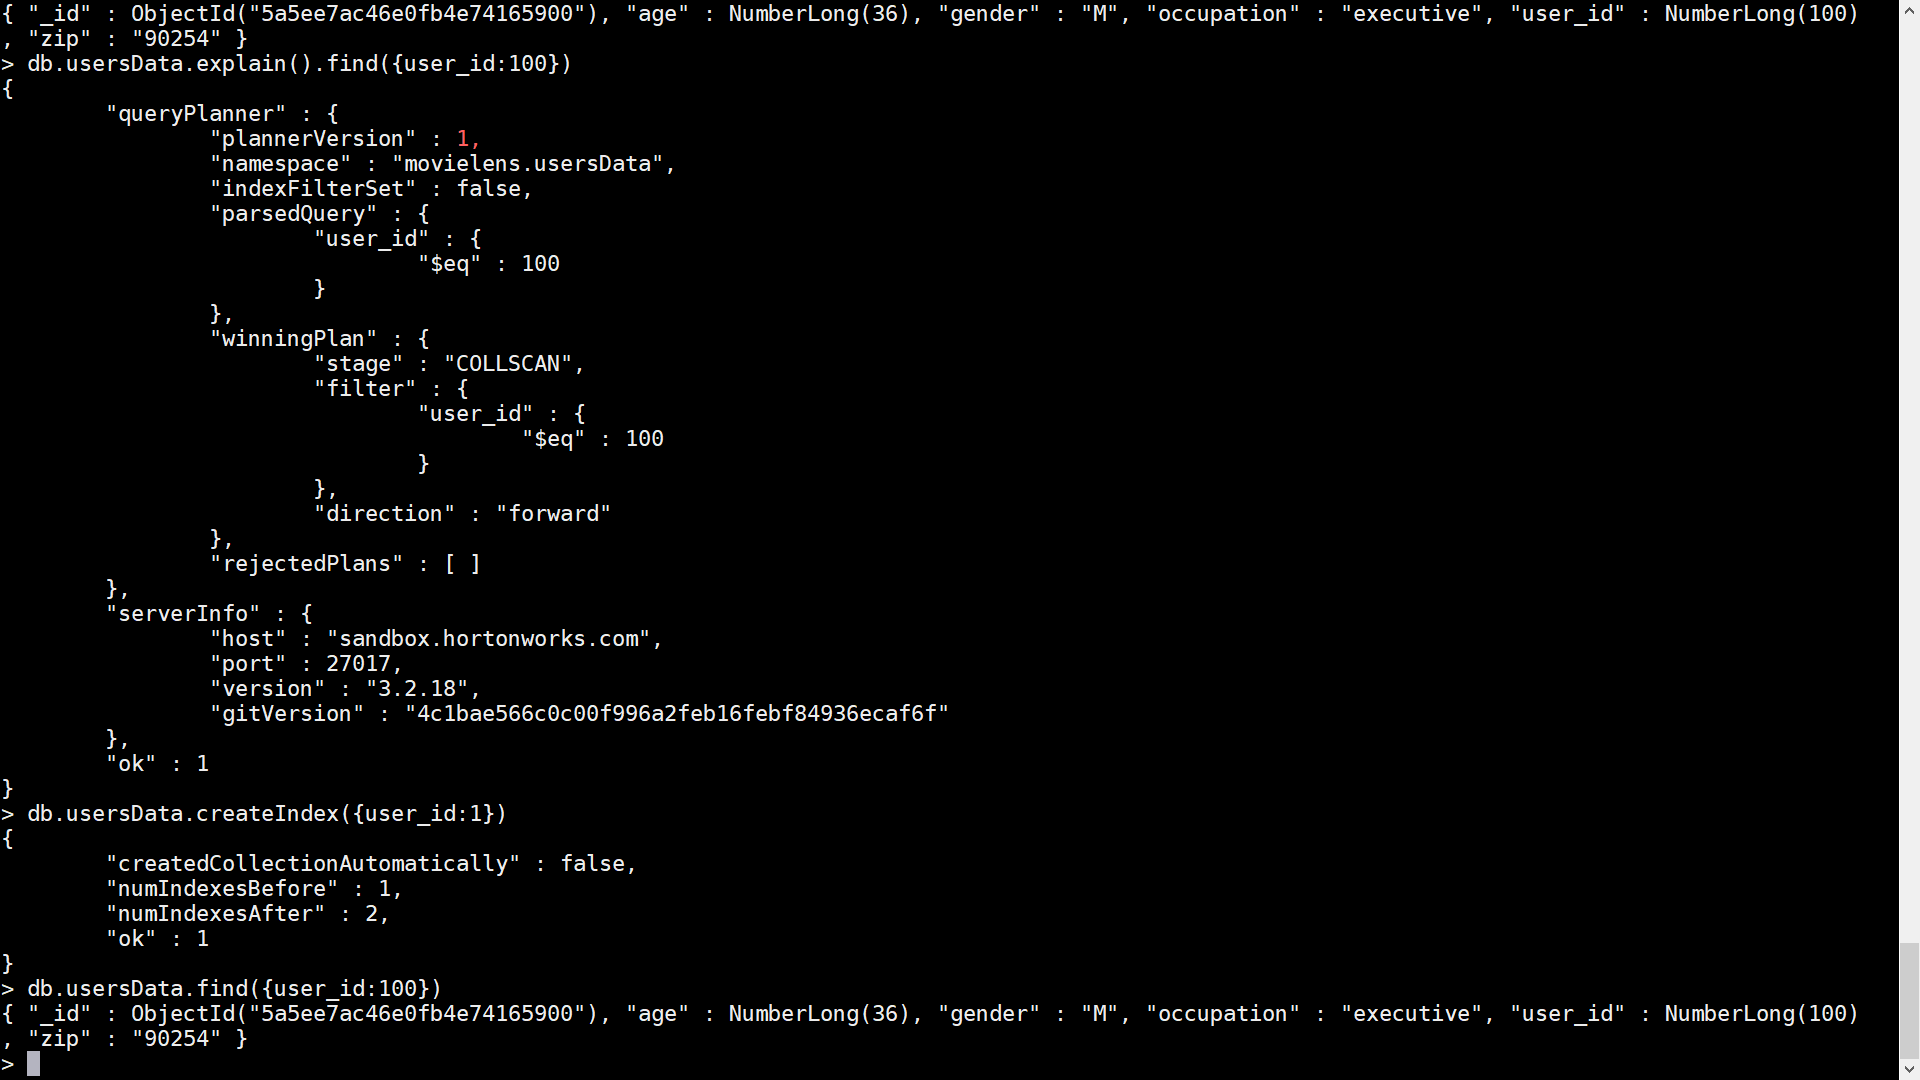
- To explain the execution plan
- db.usersData.explain().find({user_id:100})
- To Index the collection ( means creating an index on user_id field 1 means ascending order:
- db.usersData.createIndex({user_id:1})
- Count of rows in UsersData collection – db.usersData.count()
- set Spark versions to 2 :
- Install few dependencies:
- MongoDB Advanced Topics:
Big Data Integration with MongoDB Using Spark
