
Please follow the steps below to add a button (E.g. a button which calculates Time based on the Time zone with respect to the server time zone). Step 1: First login to the CMS instance using admin privileges and select the core database.  The Sitecore Ribbon is made up of 3 things – Ribbon, Strip and Chunk.
- The Ribbon looks like a tool bar.
- The Strip looks like a section on the Ribbon.
- The Chunk looks like the button on the Strip.
 Step 2: Go to “/sitecore/content/Applications/Content Editor/Ribbons/Chunks” using content editor and create a chunk called “Calculate Time” . Set the Header and ID for the chunk.
 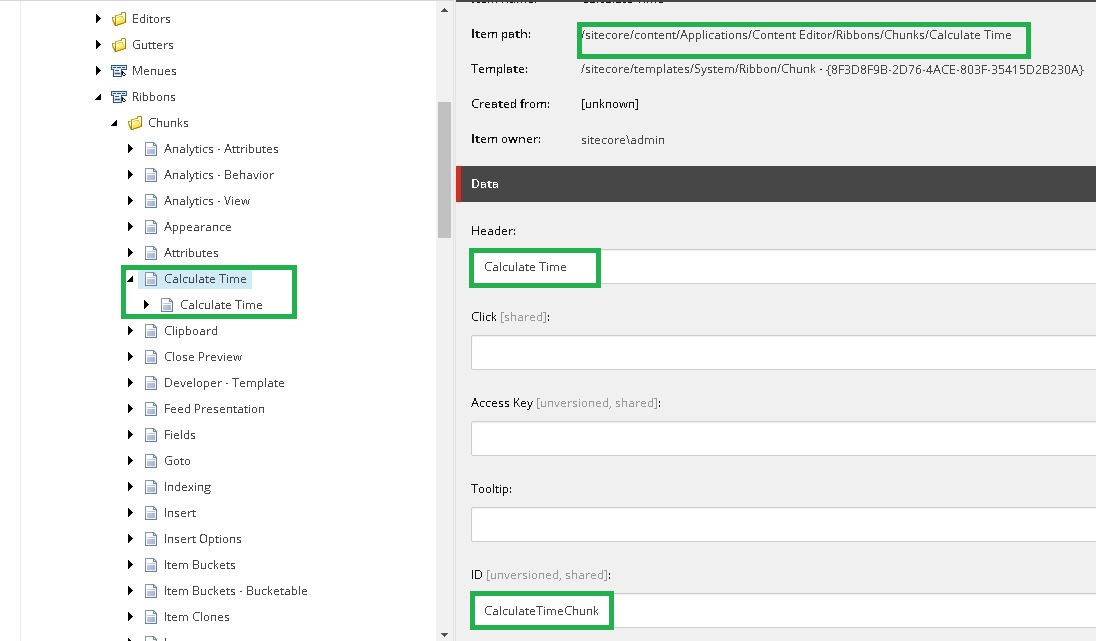 Step 3: Go to “/sitecore/content/Applications/Content Editor/Ribbons/Strips” using content editor and create a strip called “Calculate Time” inside Publish Strip and set the Reference field to the path to the “Calculate Time” chunk.
 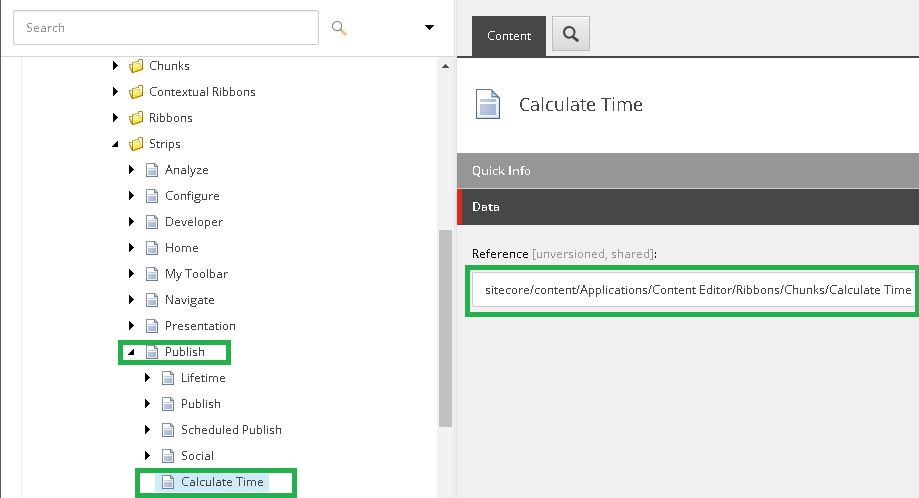 Step 4: Go to “/sitecore/content/Applications/Content Editor/Ribbons/Chunks/Calculate Time” using content editor and create a button called “Calculate Time” inside strip and set the header , Icon and click fields
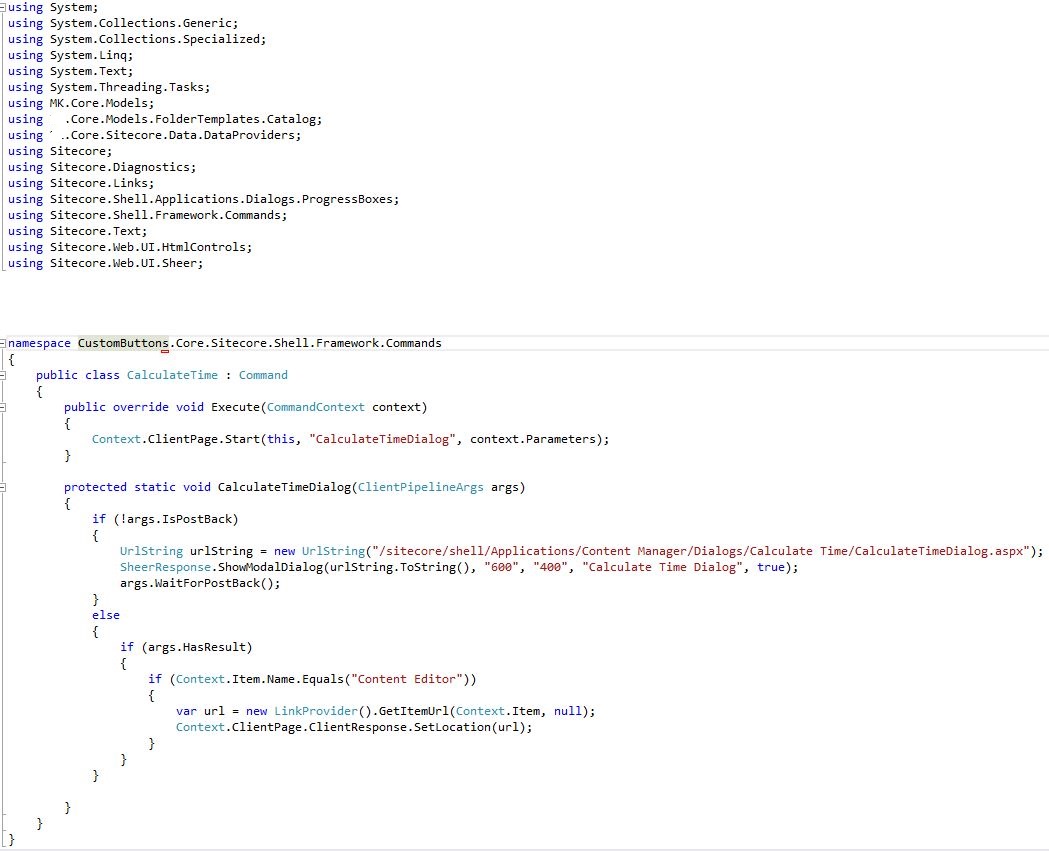
 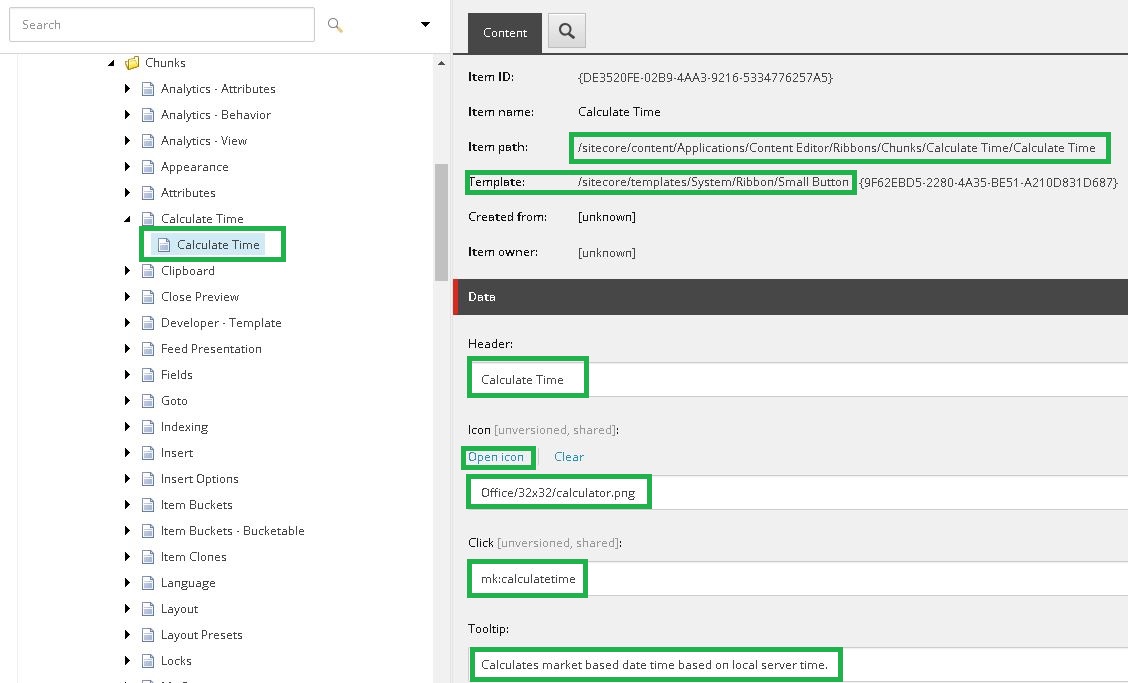 Step 5: Open “Commands.config” and add a command as highlighted.
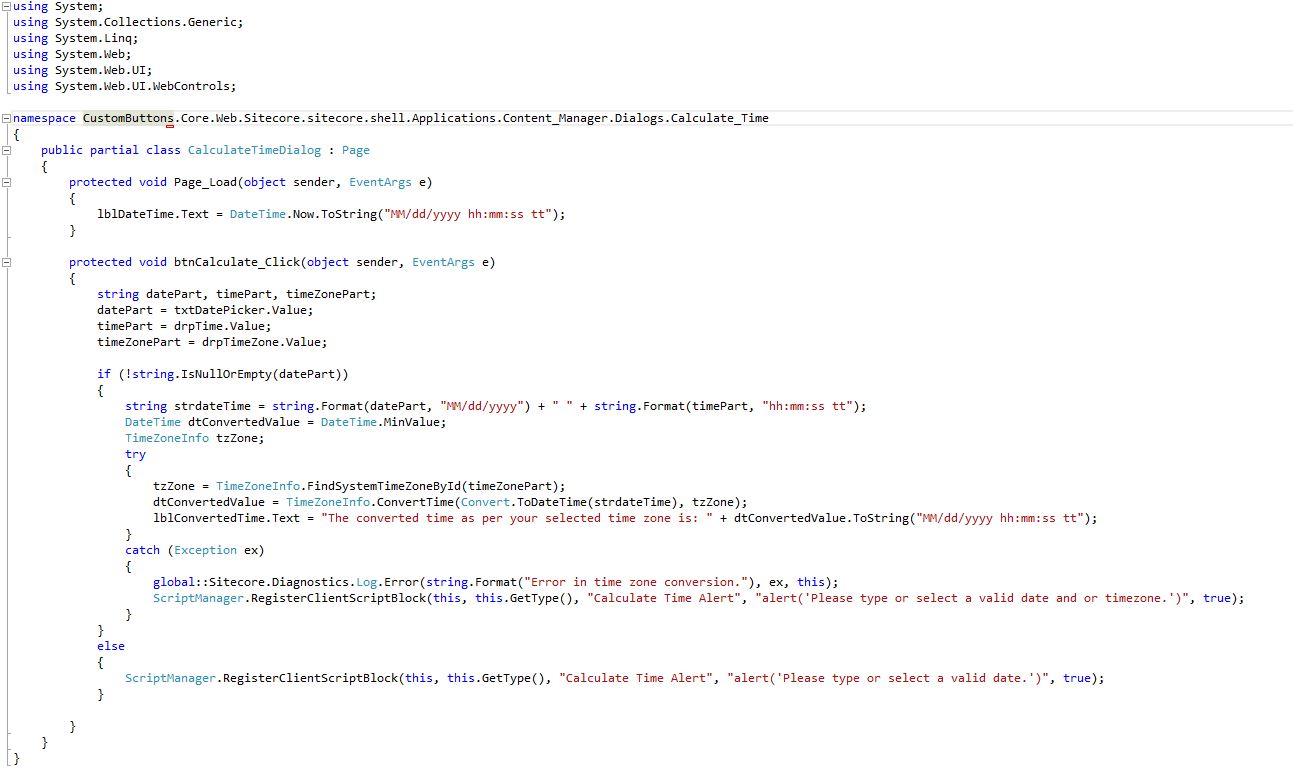
  Step 6: Now create a web page and name it ‘CalculateTime’. (The name space can be ‘CustomButtons.Core.Sitecore.Shell.Framework.Commands.CalculateTime’). Create a calendar to select date a drop down to select time and time zone and the supporting code behind to display the converted time based on time zone. And there you go. Code Behind 1 and 2 and UI:
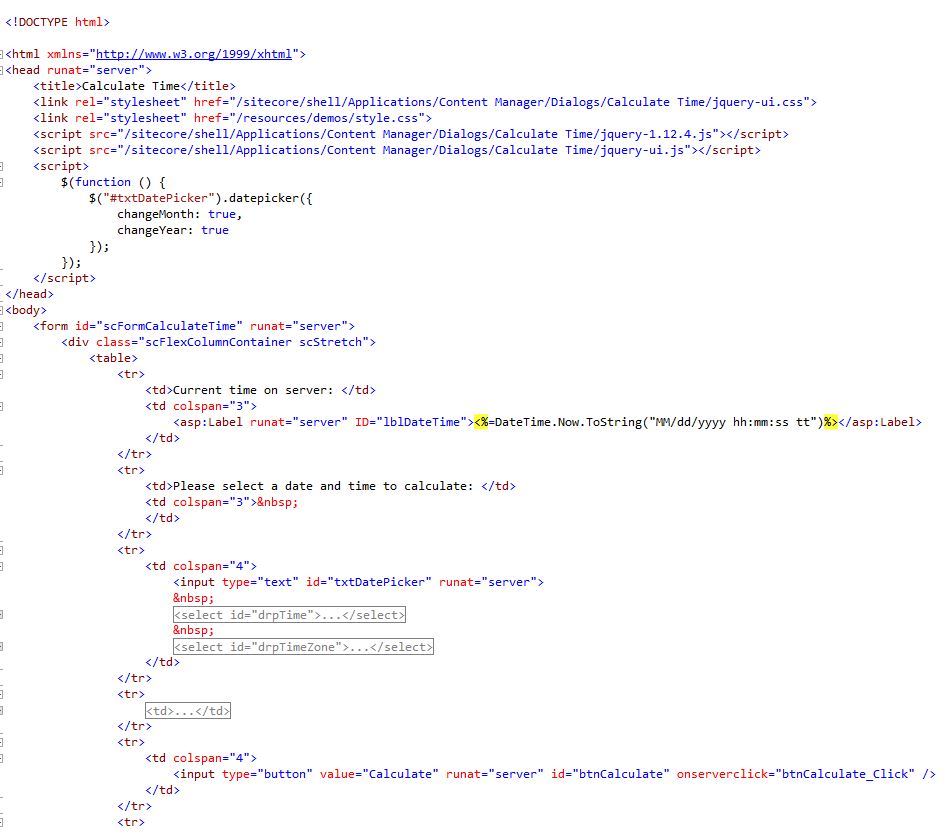
 Output: Select date, time and time zone and press “calculate”.
 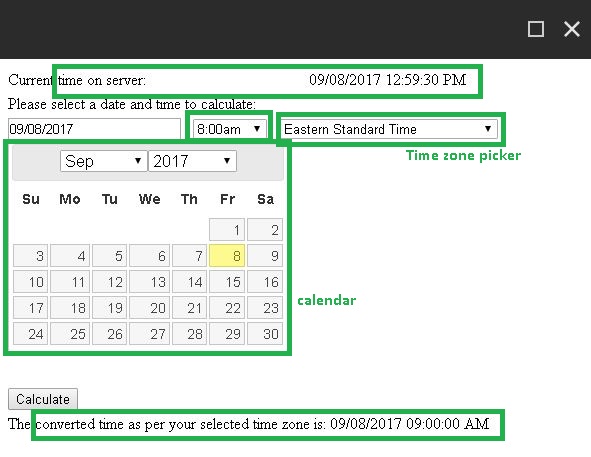 Hope you liked the explanation.