What is Presto:
- has a SQL interface to query.
- connects to multiple databases including Cassandra(which Drill can’t).
- a big plus – OLTP support with analytic and data warehousing capabilities.
- Will not be super quick as Phoenix but if you give petabytes level huge data and complex queries, it comes back like a champion.
- Facebook, Dropbox etc use it for it’s huge bid data complex analytics.(At Facebook 1000s of their employees use 300 PB scale data to run more than 30K queries everyday)
- exposes interfaces/connectors to JDBC, command line and Tableou(used by data analysts)
- connectors for Cassandra, Hive, MOngoDB, MySQL, Redis, Kafka etc to name a few.
Installing Presto:
- We will install Presto and then make it connect to Hive and Cassandra to pull the data for us from these 2 data sources and then we can use Presto SQL Commands to process data from both the data sources.
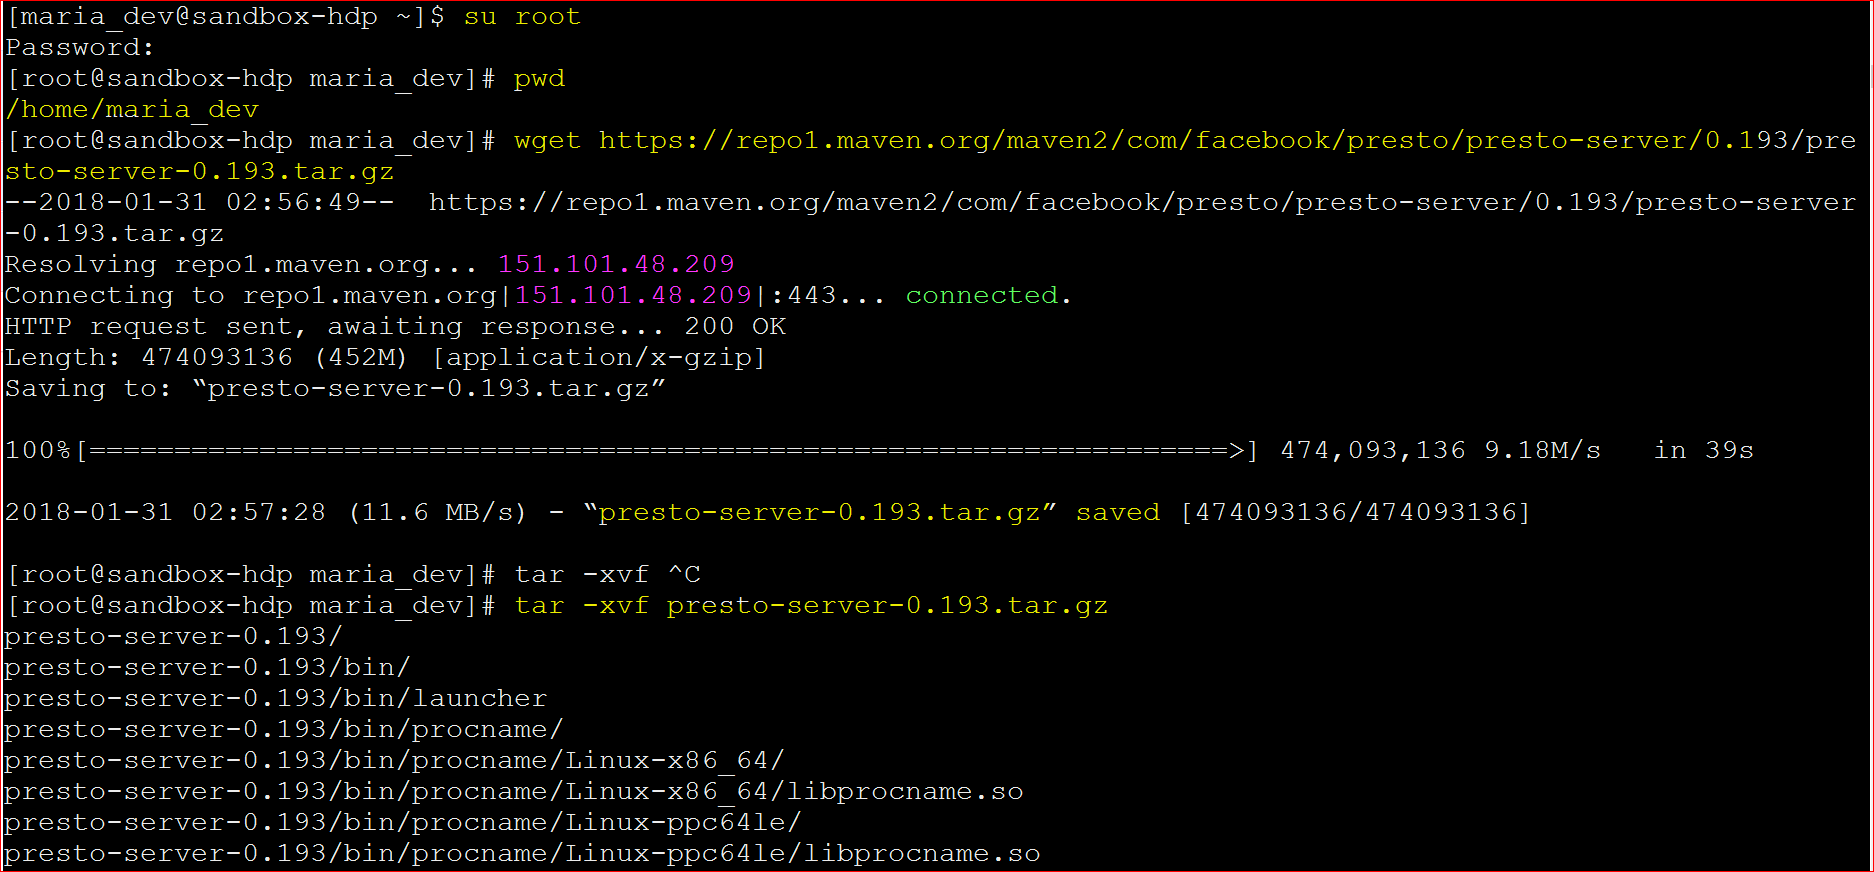
- Download the latest Presto server tar file, unzip it and change to the presto directory:
- wget https://repo1.maven.org/maven2/com/facebook/presto/presto-server/0.193/presto-server-0.193.tar.gz
- tar -xvf presto-server-0.193.tar.gz
- cd presto-server-0.193
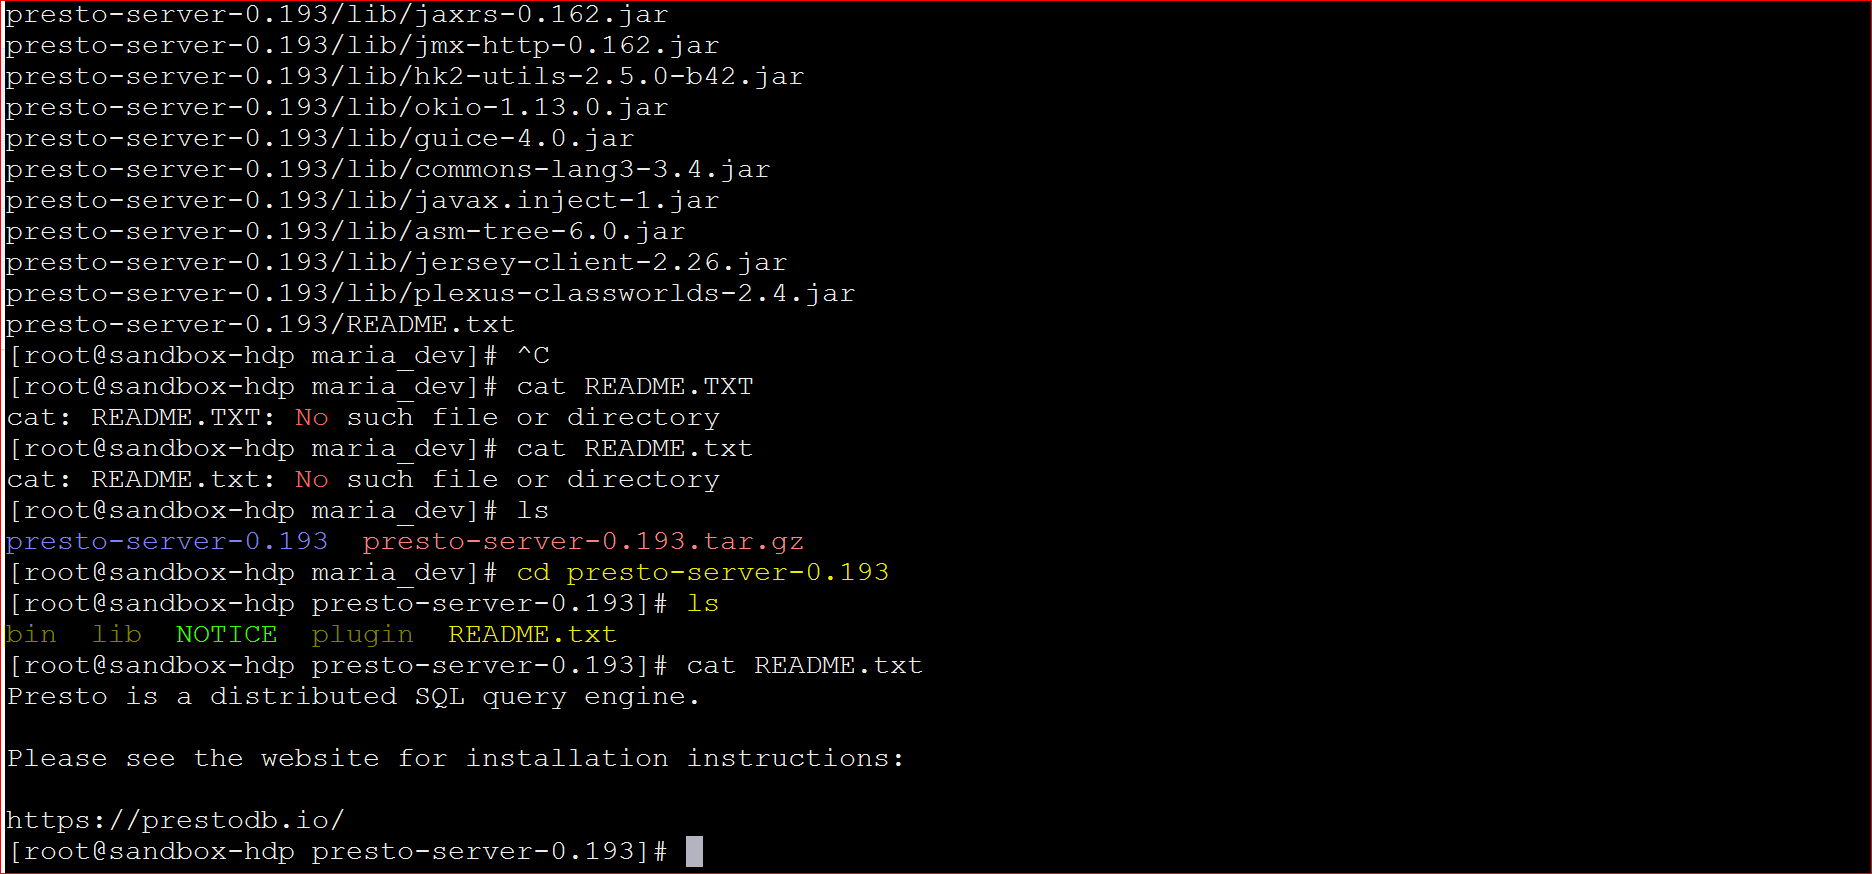
- We can see that in the ‘presto-server-0.193‘ directory there is no ‘etc’ folder for the configurations. Presto does not provide that in the tar file. Instead you have to follow the documentation in ‘Configuration Section at – https://prestodb.io/docs/current/installation/deployment.html or download the config from my S3 website –
- make sure you are in ‘presto-server-0.193′
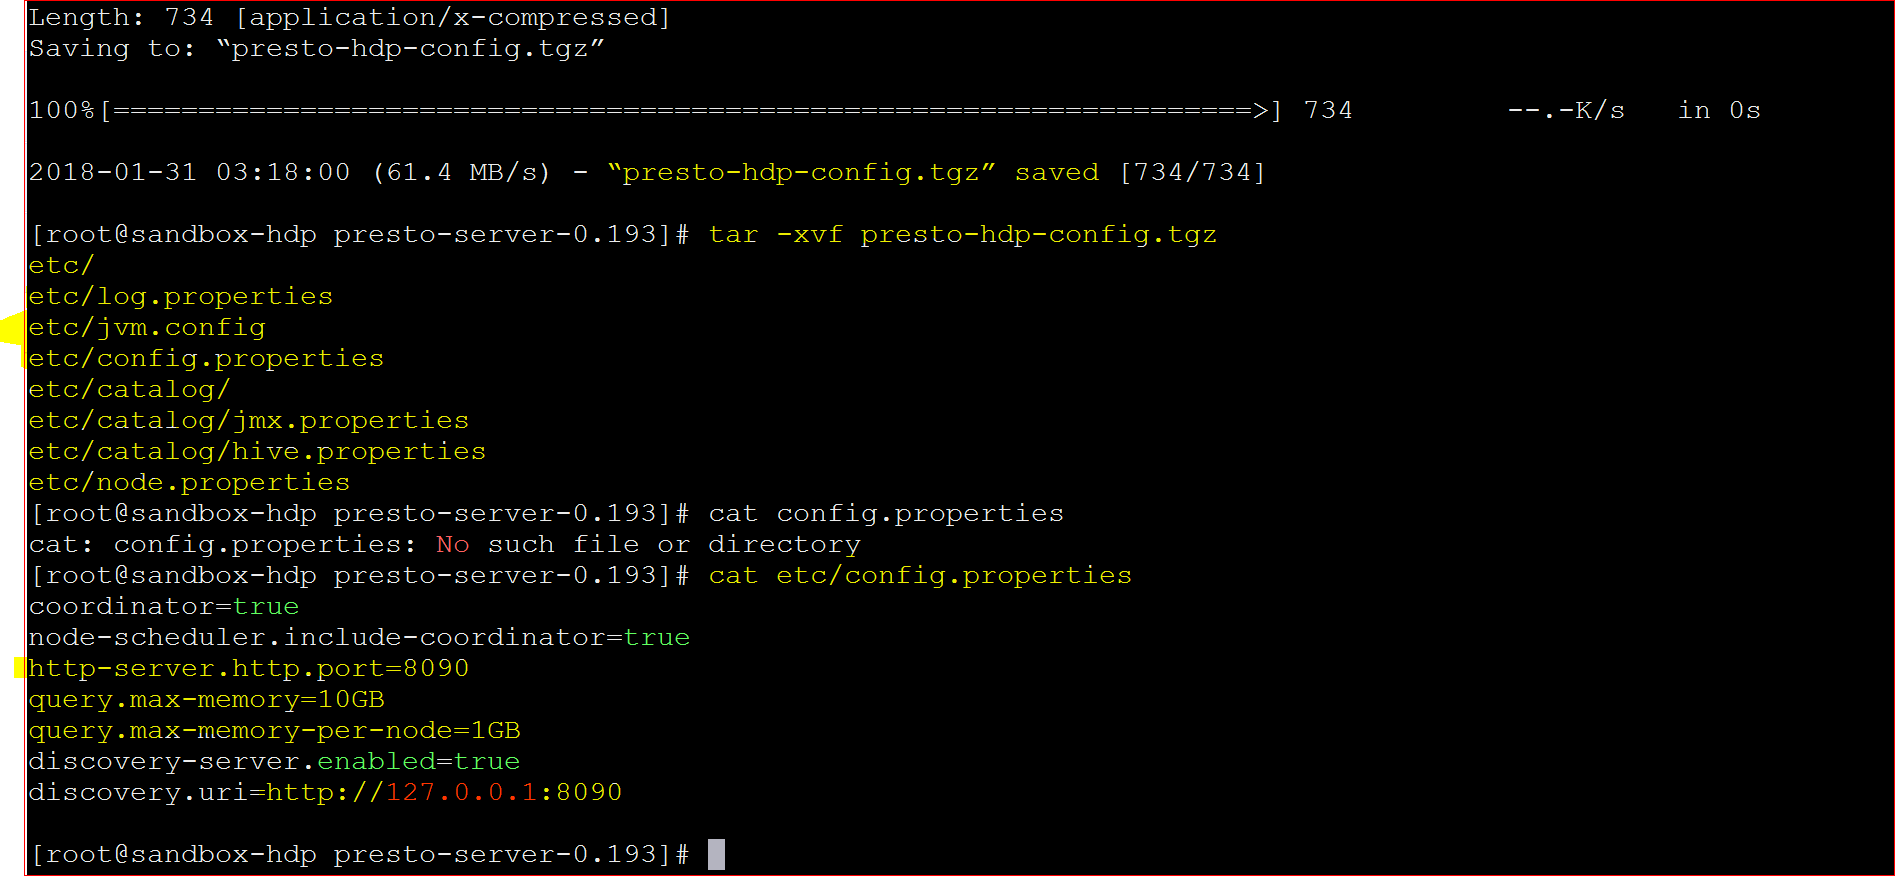
- wget https://s3.amazonaws.com/testbucket786786/presto-hdp-config.tgz
- tar -xvf presto-hdp-config.tgz
- It will create the etc directory for you.
- Let us see the contents of “config.properties” files which show the server port, memory etc. – cat etc/config.properties
- coordinator=true
node-scheduler.include-coordinator=true
http-server.http.port=8090
query.max-memory=10GB
query.max-memory-per-node=1GB
discovery-server.enabled=true
discovery.uri=http://127.0.0.1:8090
- coordinator=true
- Lets also check the file – cat etc/catalog/hive.properties
- connector.name=hive-hadoop2
hive.metastore.uri=thrift://127.0.0.1:9083
hive.config.resources=/etc/hadoop/conf/core-site.xml,/etc/hadoop/conf/hdfs-site.xml
- connector.name=hive-hadoop2
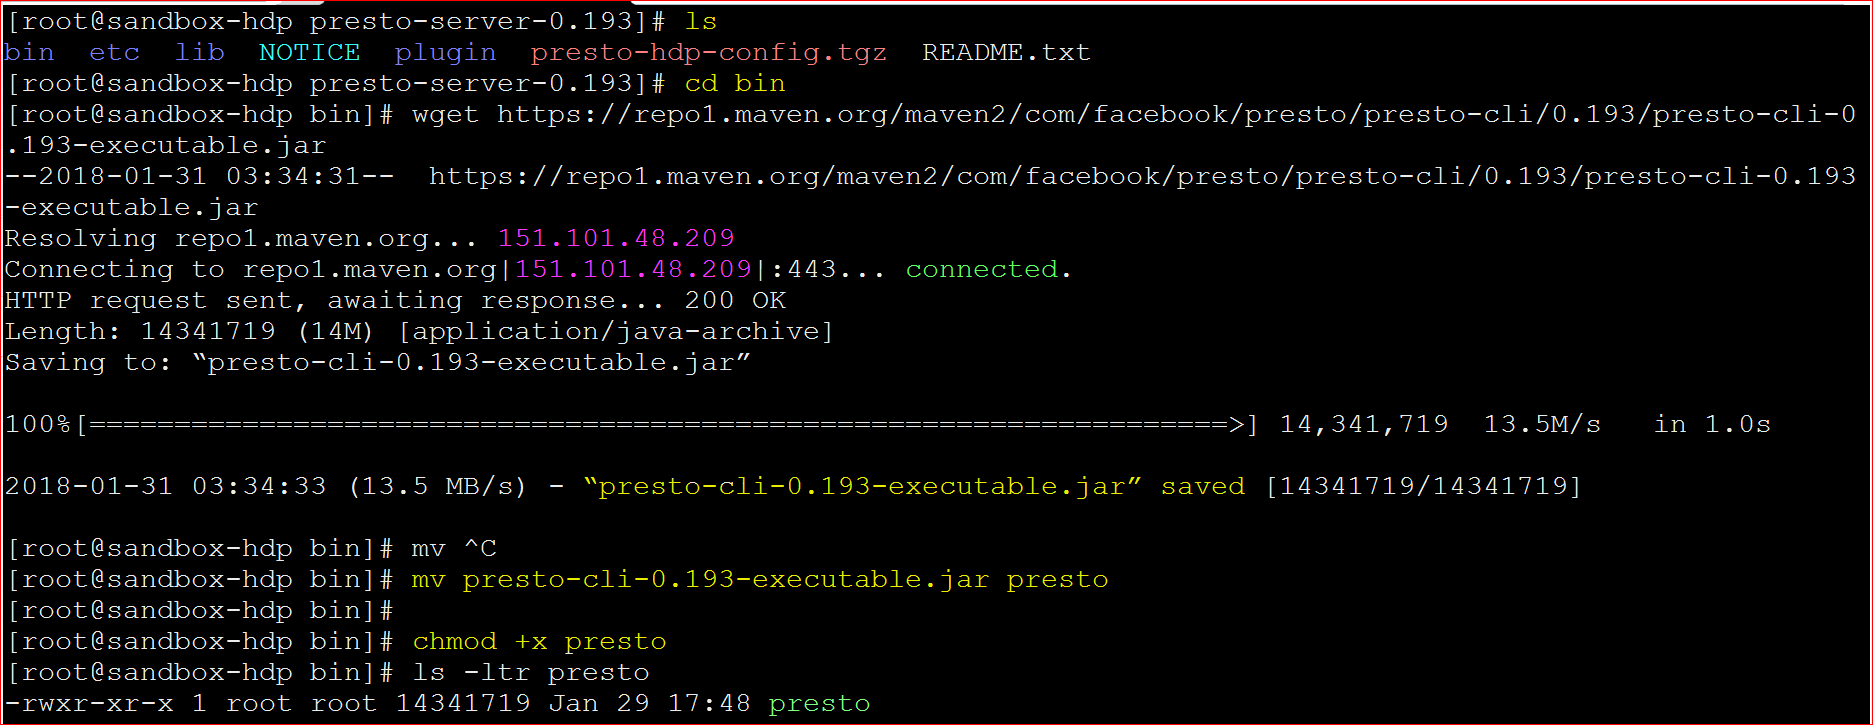
- Finally we would need the Command Line Interface Jar file
- move to the bin folder of ‘presto-server-0.193‘ directory – cd bin
- download the command line interface file – wget https://repo1.maven.org/maven2/com/facebook/presto/presto-cli/0.193/presto-cli-0.193-executable.jar
- rename the file to presto – mv presto-cli-0.193-executable.jar presto
- make presto file executable – chmod +x presto
- lets now run the Presto server (make sure you are in the bin directory of ‘presto-server-0.193’ – ./launcher start

- Now lets run the UI from the browser – http://127.0.0.1:8090
-
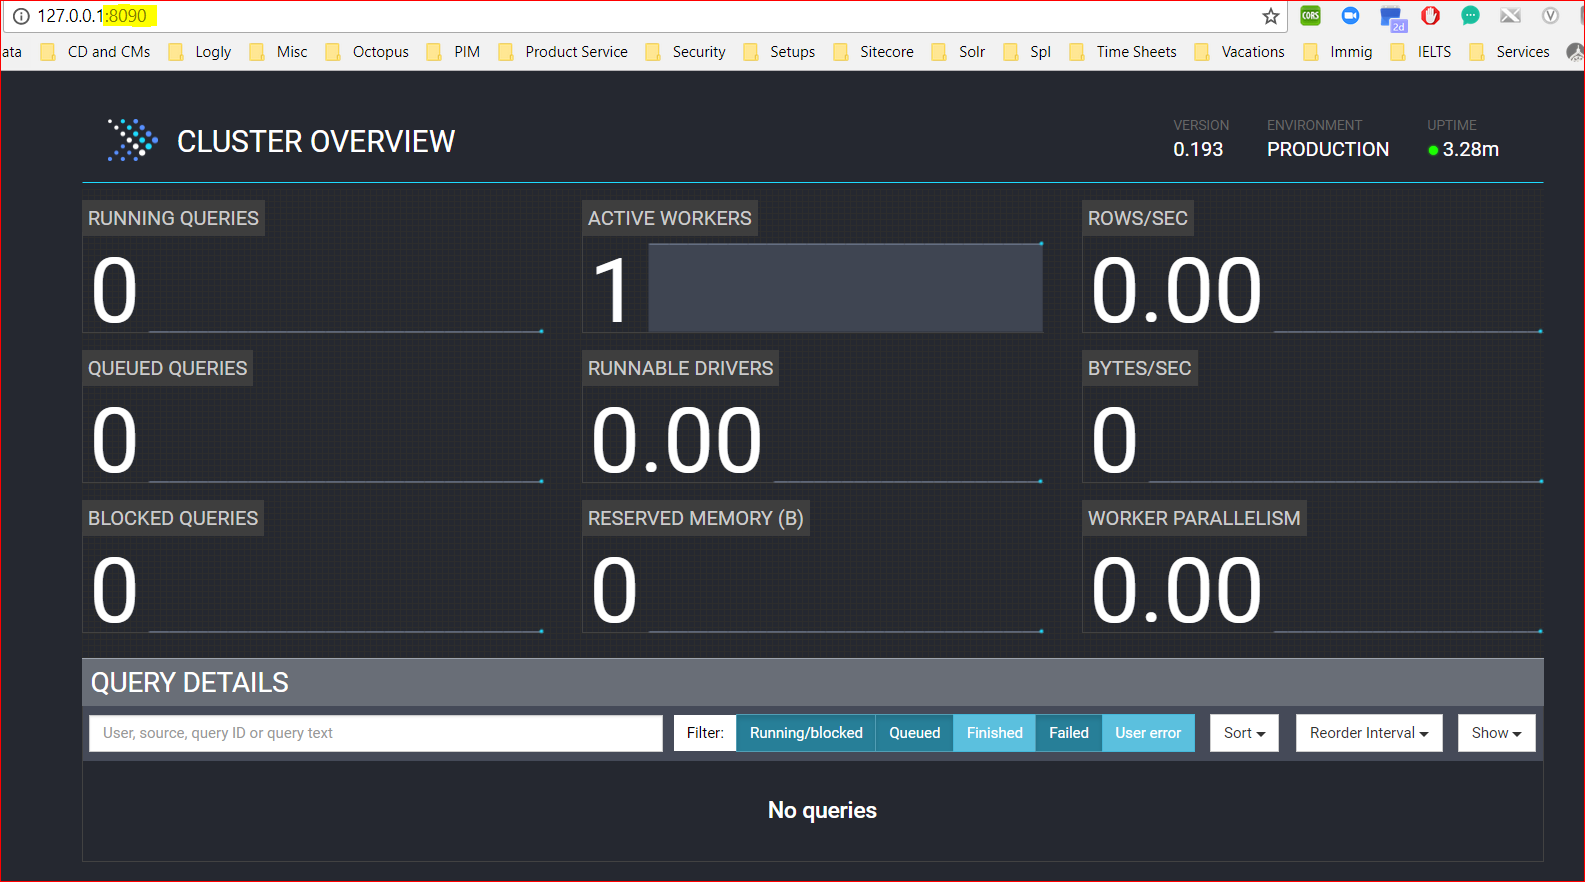
The Presto UI - Now that the Presto server is running now lets connect to Presto command line interface – ./presto –server 127.0.0.1:8090 –catalog hive –schema movielens
- In the above command you are running the presto CLI giving the parameters that server is running at 127.0.0.1:8090, you want to connect to hive and the schema is movielens
- At this stage please make sure that in Hive you already have the table ratings data in the schema movielens . If not go to this post to first create schema/database movielens and upload the ratings table – https://mohdnaeem.wordpress.com/2018/01/06/how-to-process-data-using-hadoop-hive/
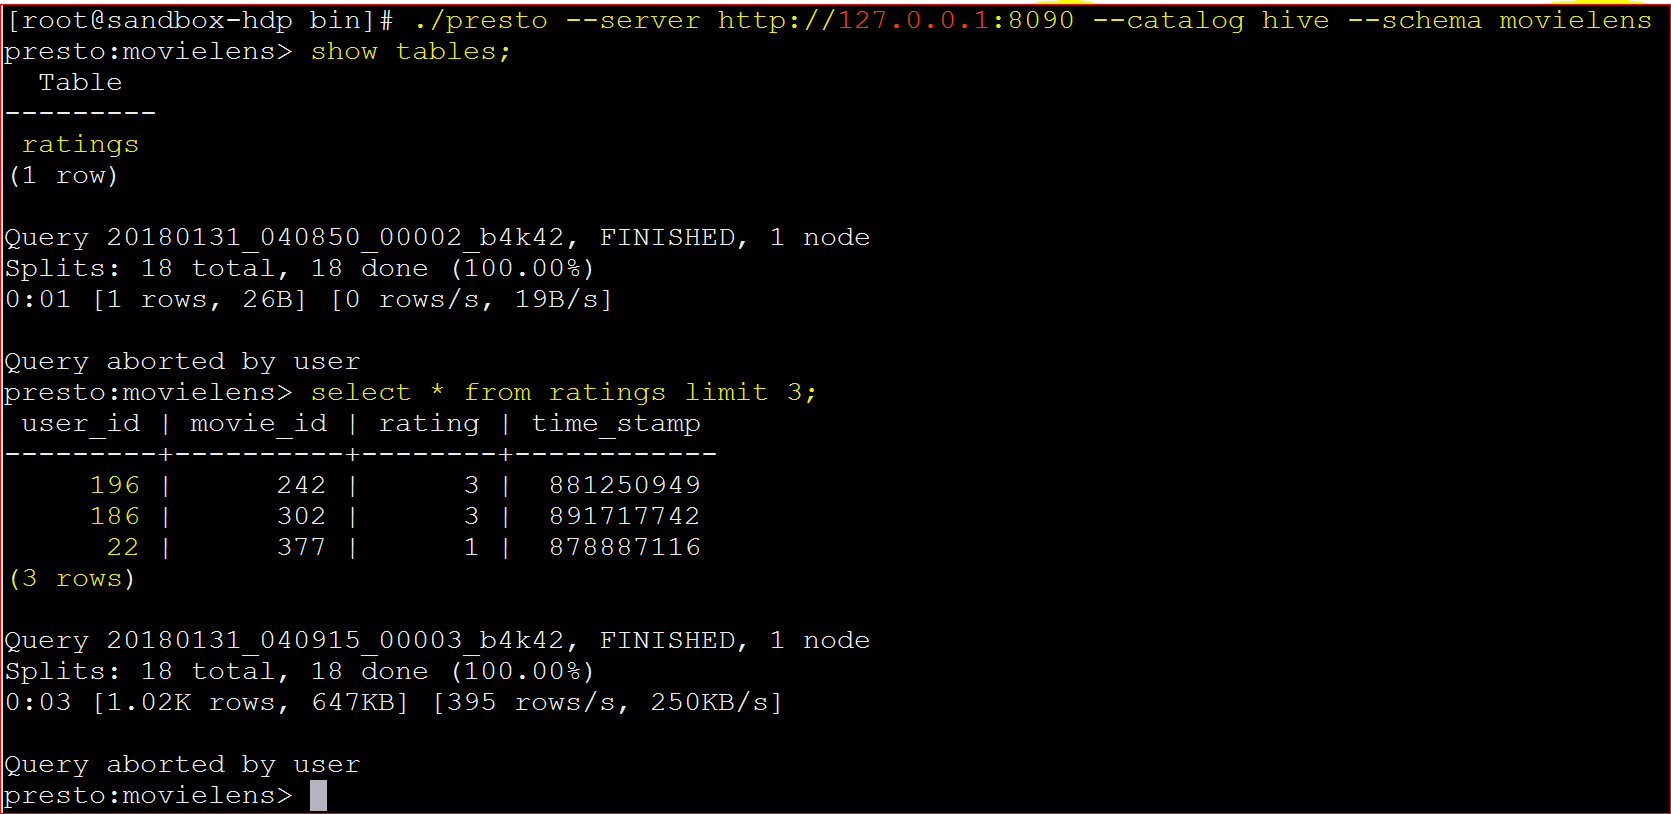
- Yay!!!… you are connected to presto CLI and then you executed the follwing 2 commands to see which tables exit and the data
- to show tables : show tables;
- to see data : select * from ratings limit 5;
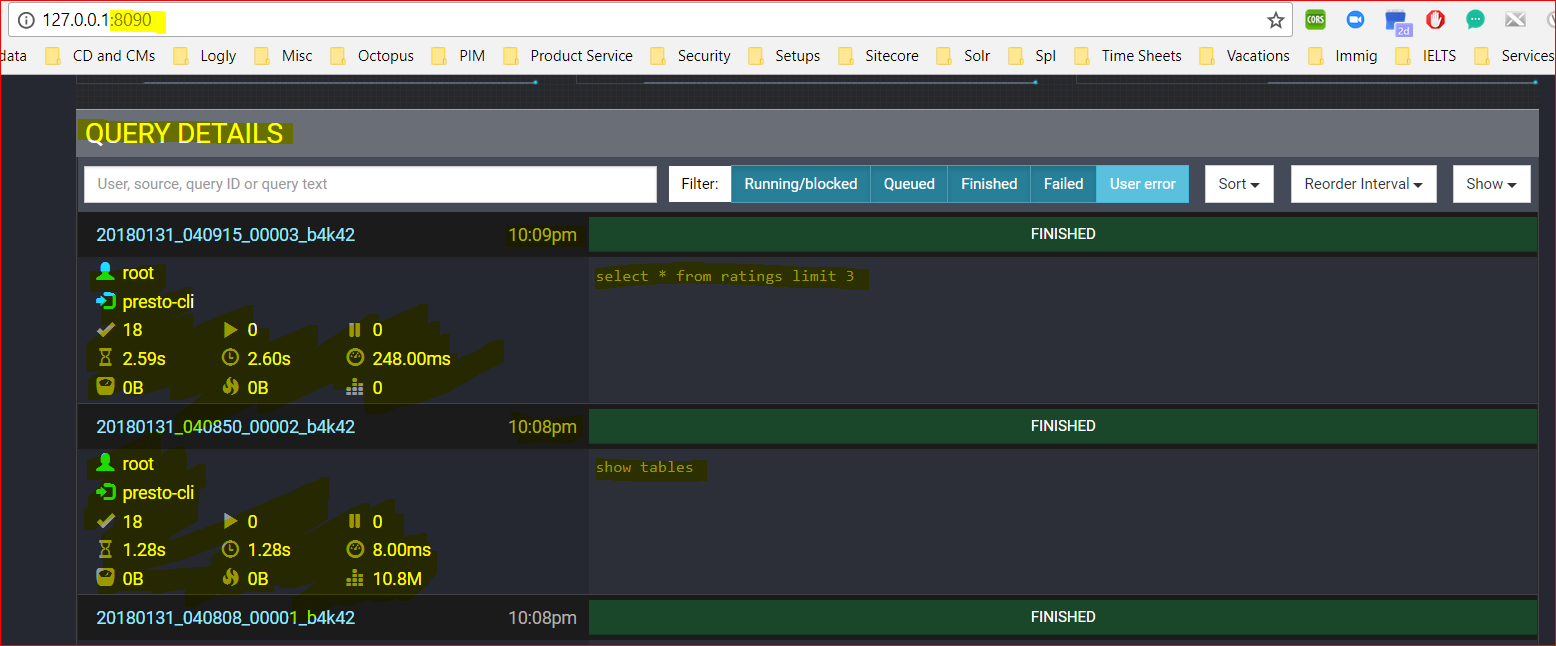
- The same can be verified from the Presto Dashboard too:
- Now lets connect Presto to Cassandra ( you can visit the post – https://mohdnaeem.wordpress.com/2018/01/15/big-data-integration-with-cassandra-using-spark/ to push users data into Cassandra, if not have done yet)
- Now you have to create Cassandra connector properties file in ‘etc/catalog’ folder in ‘presto-server-0.193‘ directory – nano cassandra.properties and add these 2 lines and save
- connector.name=cassandra
cassandra.contact-points=127.0.0.1
- connector.name=cassandra
- Now move back to “bin” folder and execute –
- ./launcher start
- ./presto –server 127.0.0.1:8090 –catalog hive,cassandra
- See that in catalog we are saying that we want to connect hive and Cassandra both
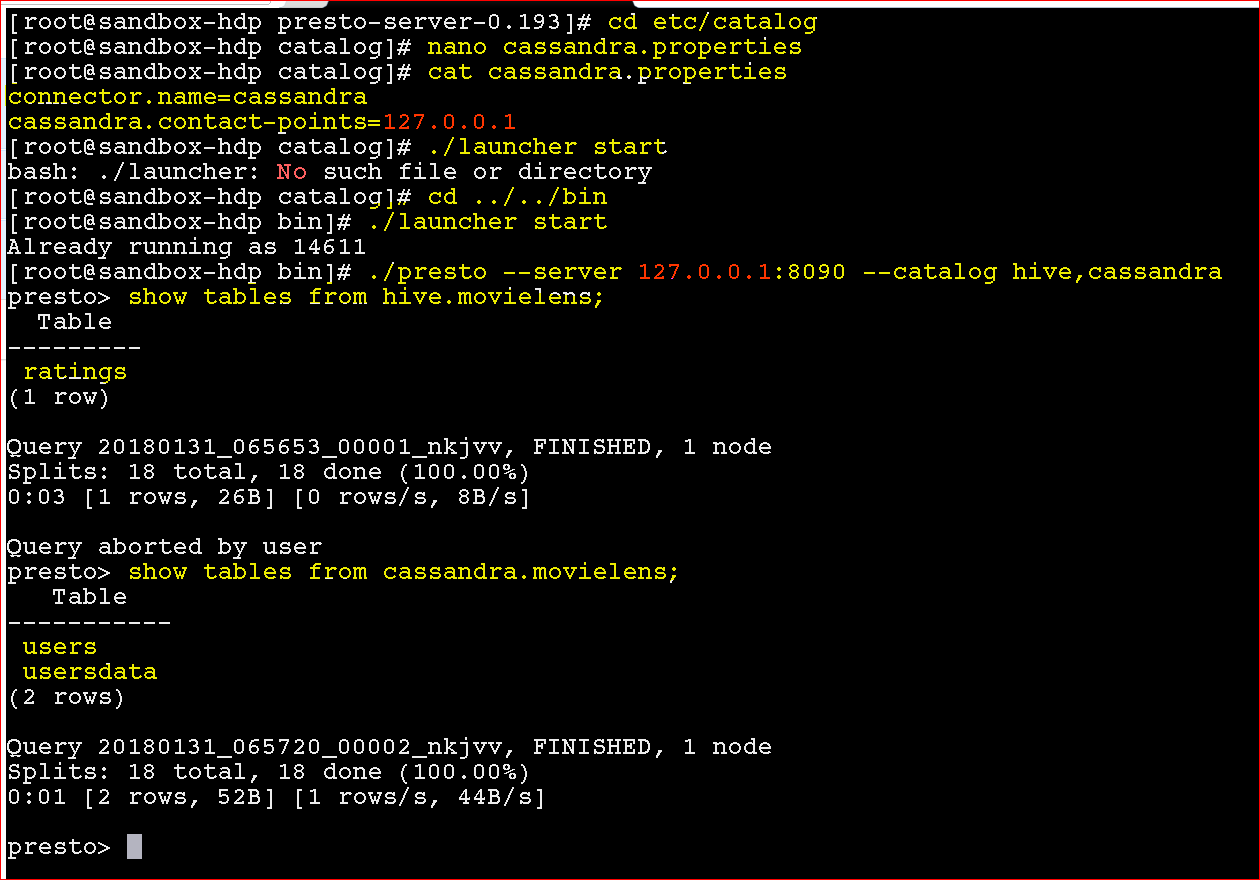
- To see tables from Cassandra – show tables from cassandra.movielens;
- To see tables from Hive- show tables from hive.movielens;
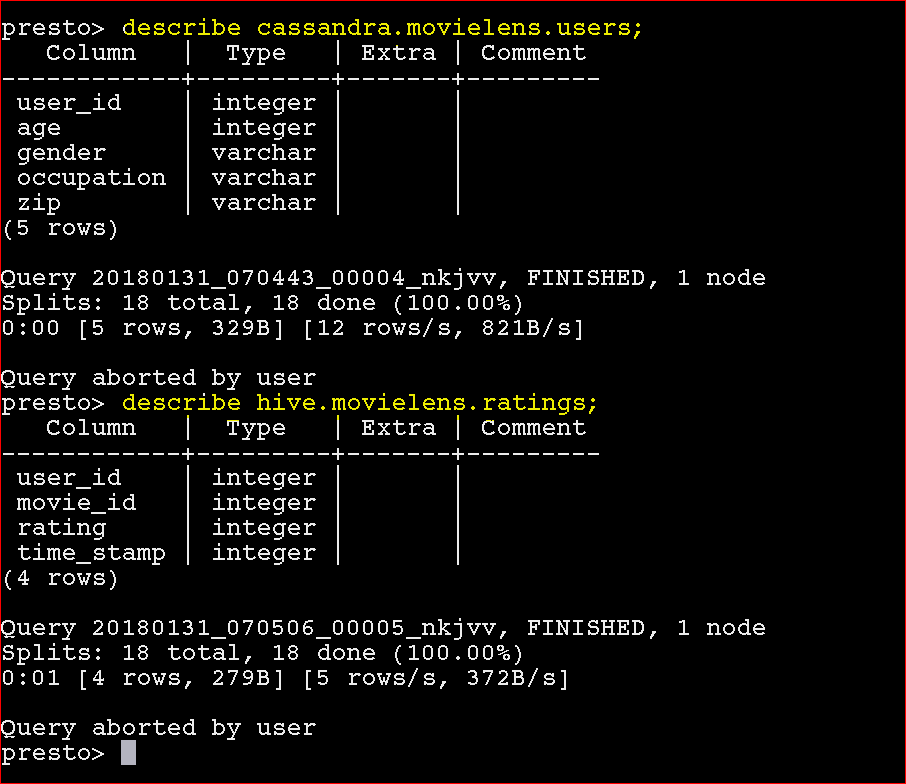
- To describe table from Cassandra – describe cassandra.movielens.users;
- To describe table from Hive- describe hive.movielens.ratings;
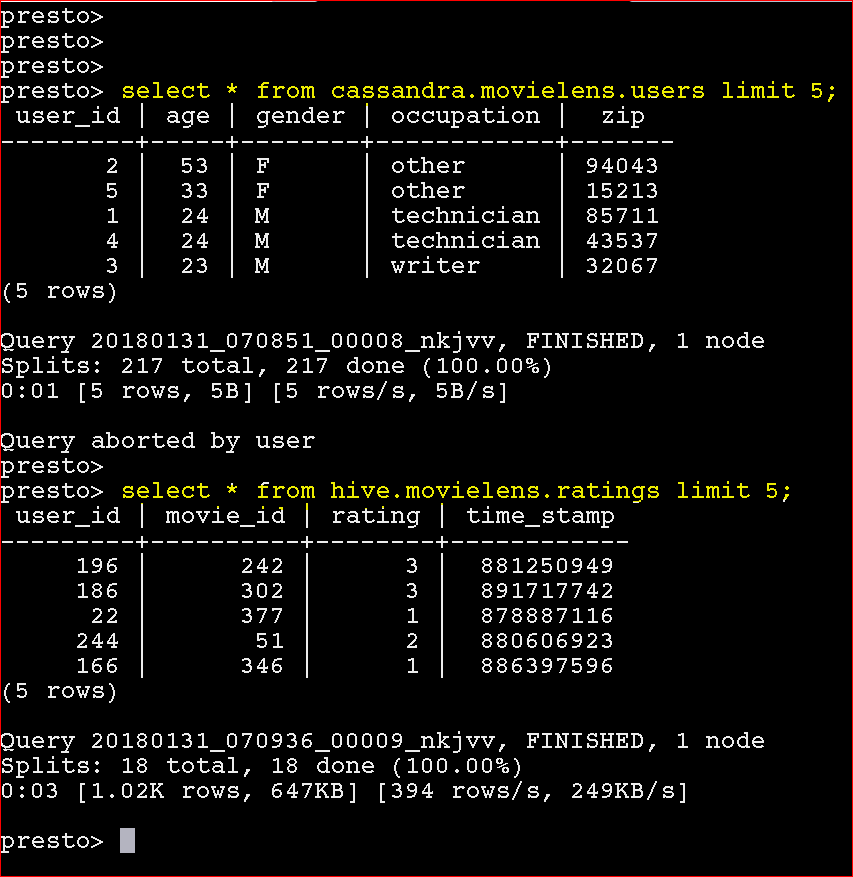
- To see table data from Cassandra – select * from cassandra.movielens.users limit 5;
- To see table data from Hive- select * from hive.movielens.ratings limit 5;
- Now once we are have done these basic operations, now lets join –
- select u.occupation, count(*) from cassandra.movielens.users u join hive.movielens.ratings r on r.user_id=u.user_id group by u.occupation
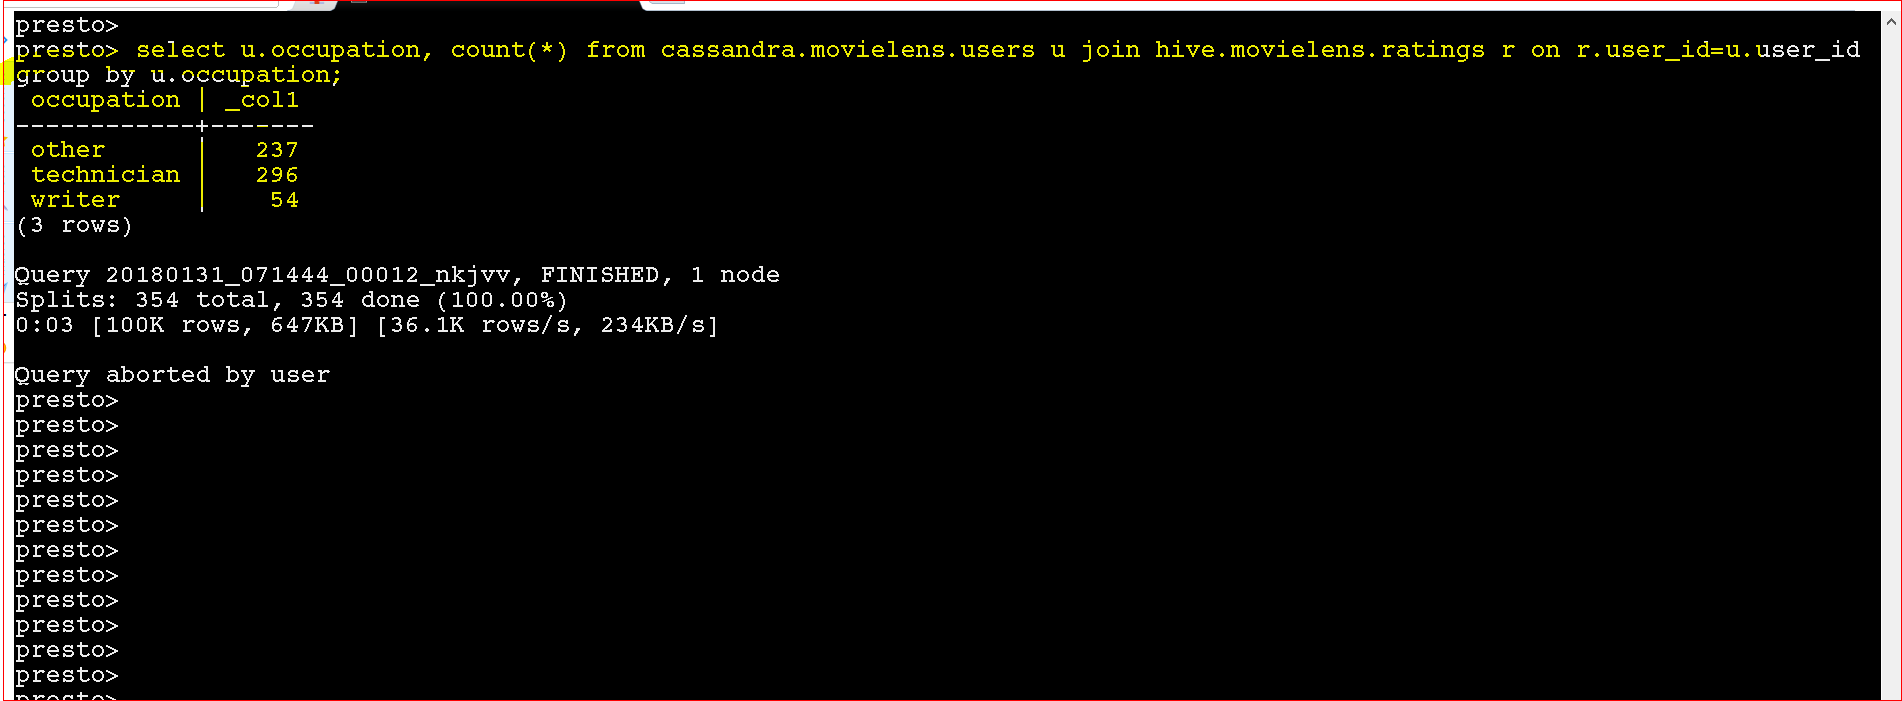
- Yay!!!, you handled with data from 2 different data sources and processed it.
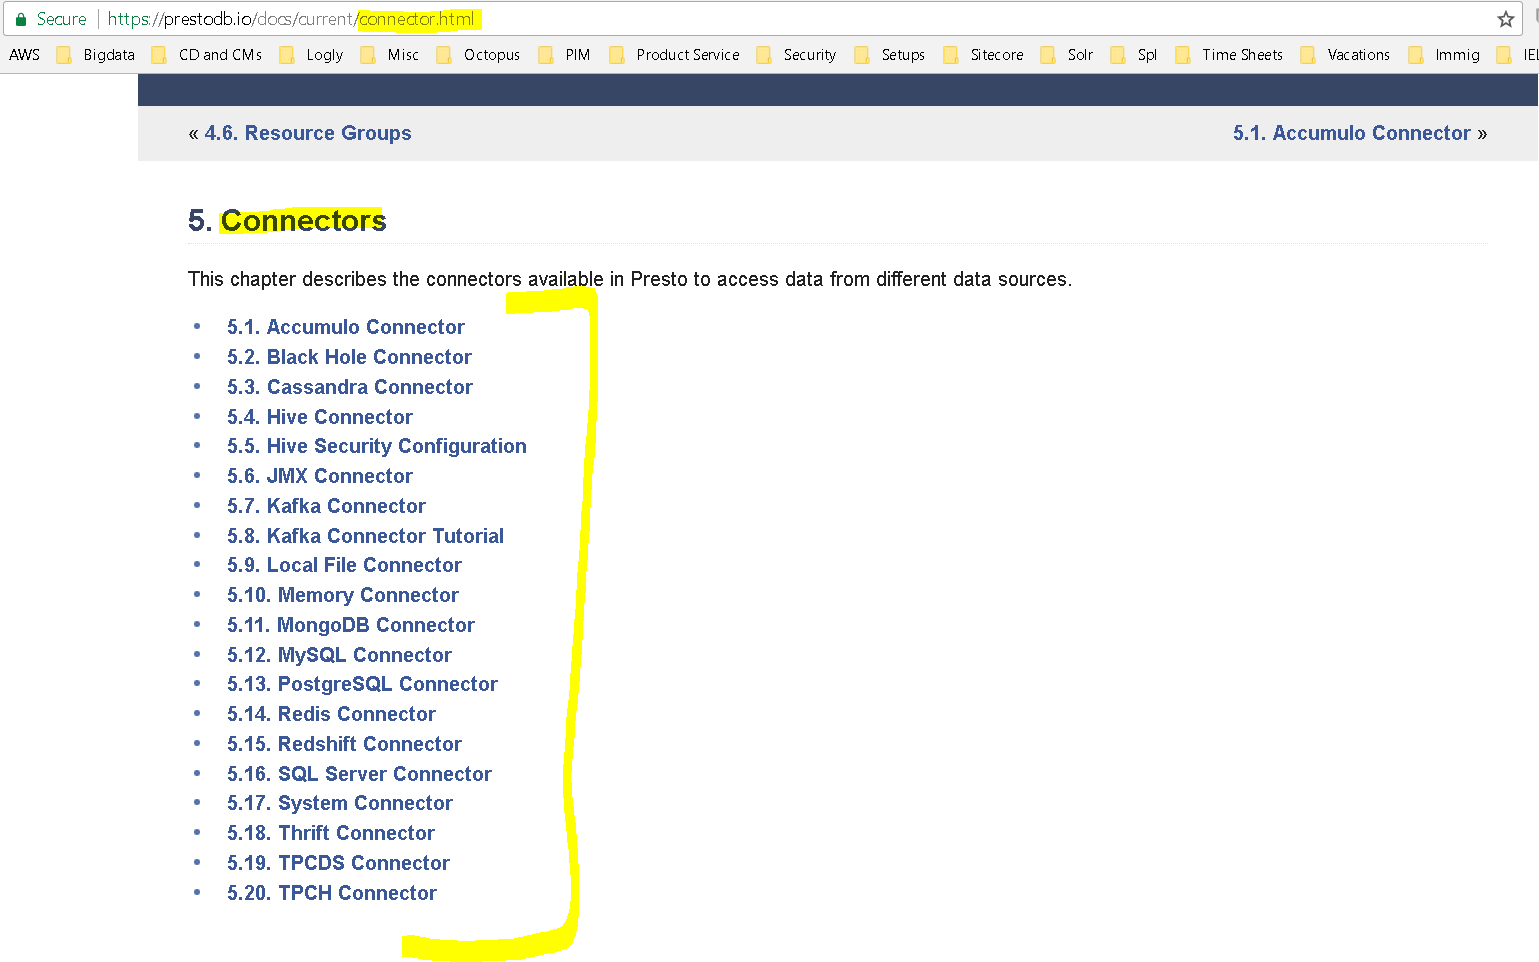
- If you want to connect to other data sources here is the documentation for them – https://prestodb.io/docs/current/connector.html