
Sitecore Connect is a recipe workbench on Workato under the Sitecore Cloud Portal. This guide walks through how to use it, which recipes to start with, and the exact clicks you make inside each recipe step.
Executive thesis
Most Connect failures I see are not "Workato is broken." They are soft connections, vague triggers, and field maps that look green in Test but explode on the second retry. If you treat a recipe like a named contract with an owner, an idempotency story, and a stop condition, Connect becomes boring in the best way.
This post is a field guide for platform engineers and integration leads. It covers Sitecore Connect (the Cloud Portal app built on Workato), not the older Sitecore Connect for Content Hub CMP/DAM module alone. You will build three starter recipes with step-by-step configuration, then harden them so retries do not clone Sitecore items.
What Sitecore Connect is (and is not)
Sitecore documents Connect as an integration workbench that links Sitecore products to the rest of your stack with a no-code or low-code canvas. Under the hood it is Workato: recipes (trigger + actions), connectors (auth and verbs per app), and projects that group related work.
You open it from the Sitecore Cloud Portal when your organization has Connect enabled. Non-production capacity is capped (Sitecore publishes fair-use task limits for non-prod). Production capacity is higher and billed against your agreement. Do not load-test against production recipes.
- Use Connect recipes when you need CRM sync, ticket create, Slack alerts, scheduled exports, or webhook fan-out across SaaS tools.
- Use SCCH CMP/DAM when Content Hub entities and assets must land in XP/XM with Sitecore-native mapping. That is a different installer and a different ops model.
- Use custom middleware when you need hard idempotency stores, complex branching, or sub-second APIs that recipes cannot own cleanly.
Basics: projects, connections, recipes
Open the app
- Sign in to the Sitecore Cloud Portal with an org that includes Sitecore Connect.
- Launch Sitecore Connect.
- Land on Projects (or create one: name it by environment, for example
xm-prod-integrationsvsxm-uat-integrations).
Never mix UAT and production connections in the same project. A wrong connection pick in one action is how test data hits live CRM.
Create a connection before the recipe
- Open Connections (or Assets > Connections, depending on your Connect UI revision).
- Choose the app (Salesforce, ServiceNow, Slack, Content Hub, HTTP, and so on).
- Authenticate with the least-privilege account you can defend in an audit.
- Name the connection with environment + system + purpose:
prod-salesforce-ro-leads, notSalesforce 1. - Save and run the connection test. Do not start a recipe on a failed connection.
Recipe anatomy you must get right
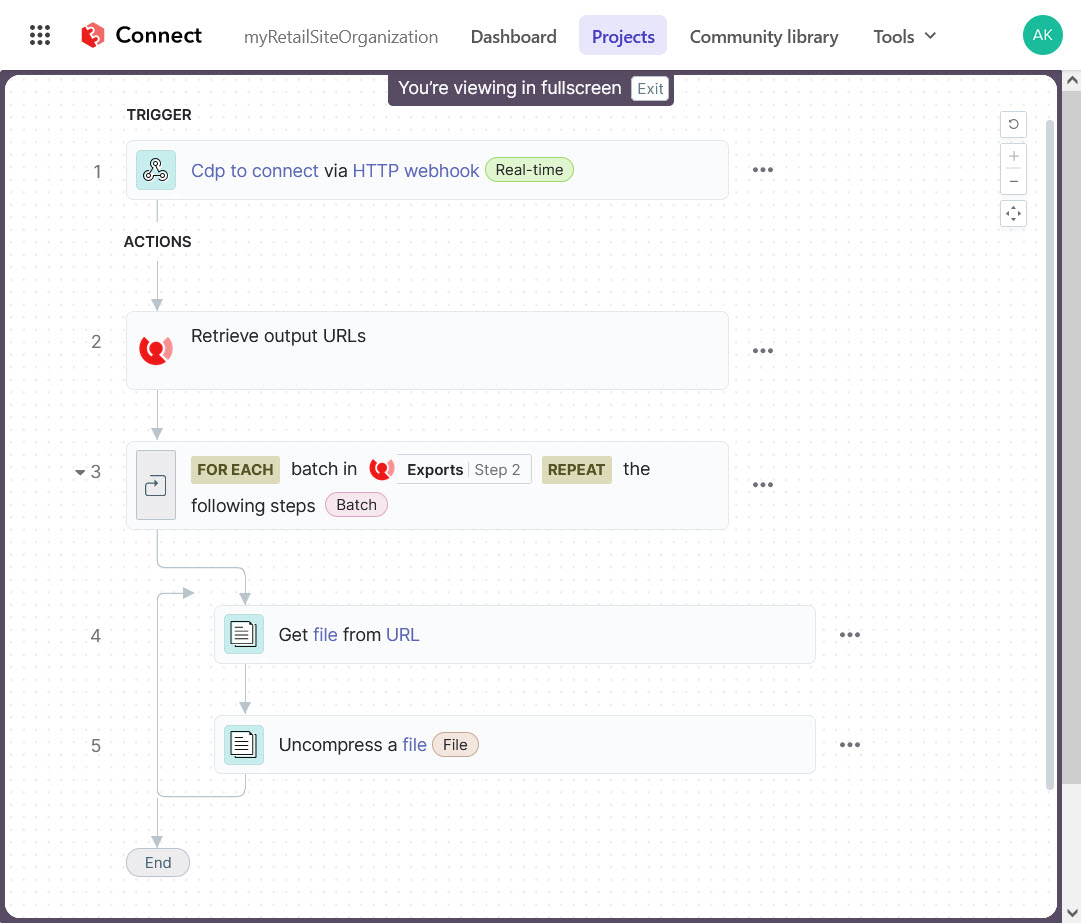
Every recipe has:
- Trigger — when it starts (app event, schedule, webhook, API request, or callable function).
- Actions — ordered steps that read or write other apps.
- Datapills — output fields from earlier steps you drag into later inputs.
- Logic — IF conditions, loops, error handlers, stop.
Starting points I actually use:
- Trigger from an app for CRM or Sitecore events.
- Run on a schedule for nightly reconciles.
- Trigger from a webhook when a custom service must push into Connect.
- Build an API endpoint when another system must call you synchronously.
Recipe 1: Content Hub publish alert to Slack (step by step)
Goal: when a Content Hub asset reaches an Approved state, post a short Slack message to the content ops channel. No Sitecore item write yet. This teaches triggers, filters, and datapills safely.
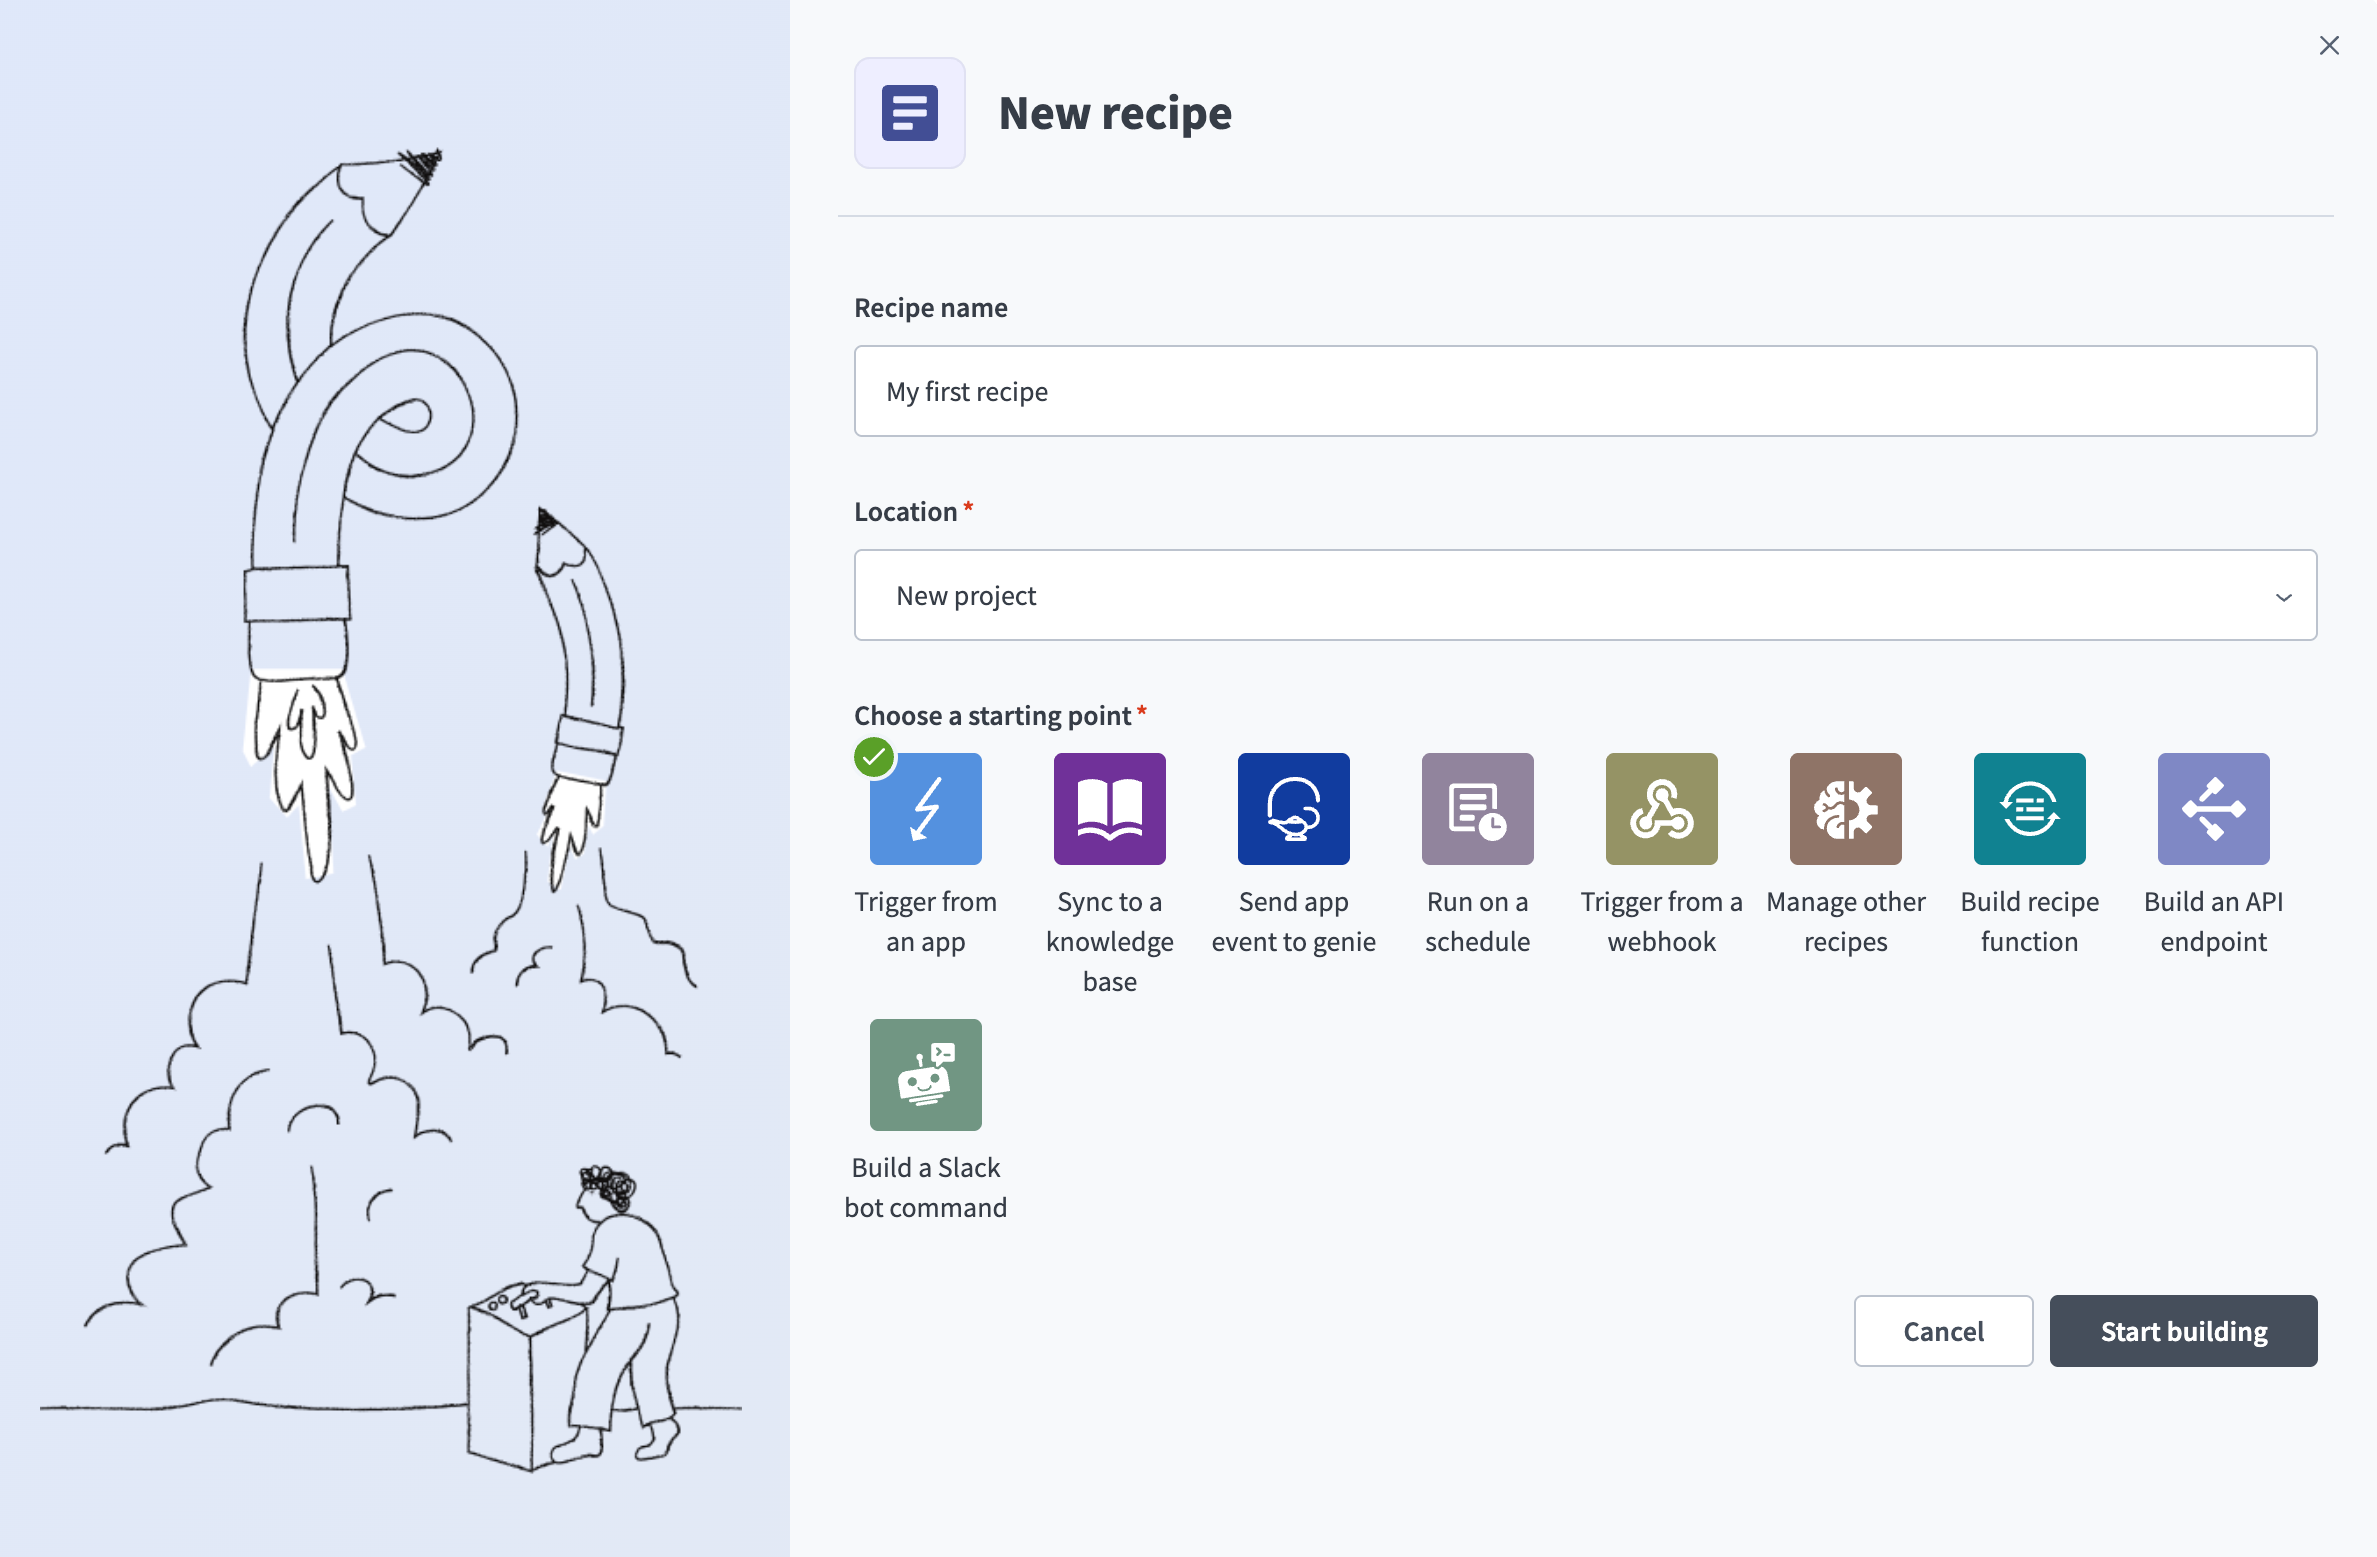
Create the recipe shell
- In your UAT project, click Create > Recipe.
- Name:
uat-ch-asset-approved-slack. - Location: the UAT project folder.
- Starting point: Trigger from an app.
- Click Start building.
Configure the trigger
- In the trigger step, search for Sitecore Content Hub (or the Content Hub connector available to your tenant).
- Choose an event close to "new/updated entity" or "workflow state change" for your connector version. If your tenant only exposes a generic entity update, you will add a trigger condition next.
- Pick the UAT Content Hub connection.
- Set entity type to the asset definition you care about (for example
M.Assetor your project-specific definition). - Open Set trigger condition (or equivalent filter).
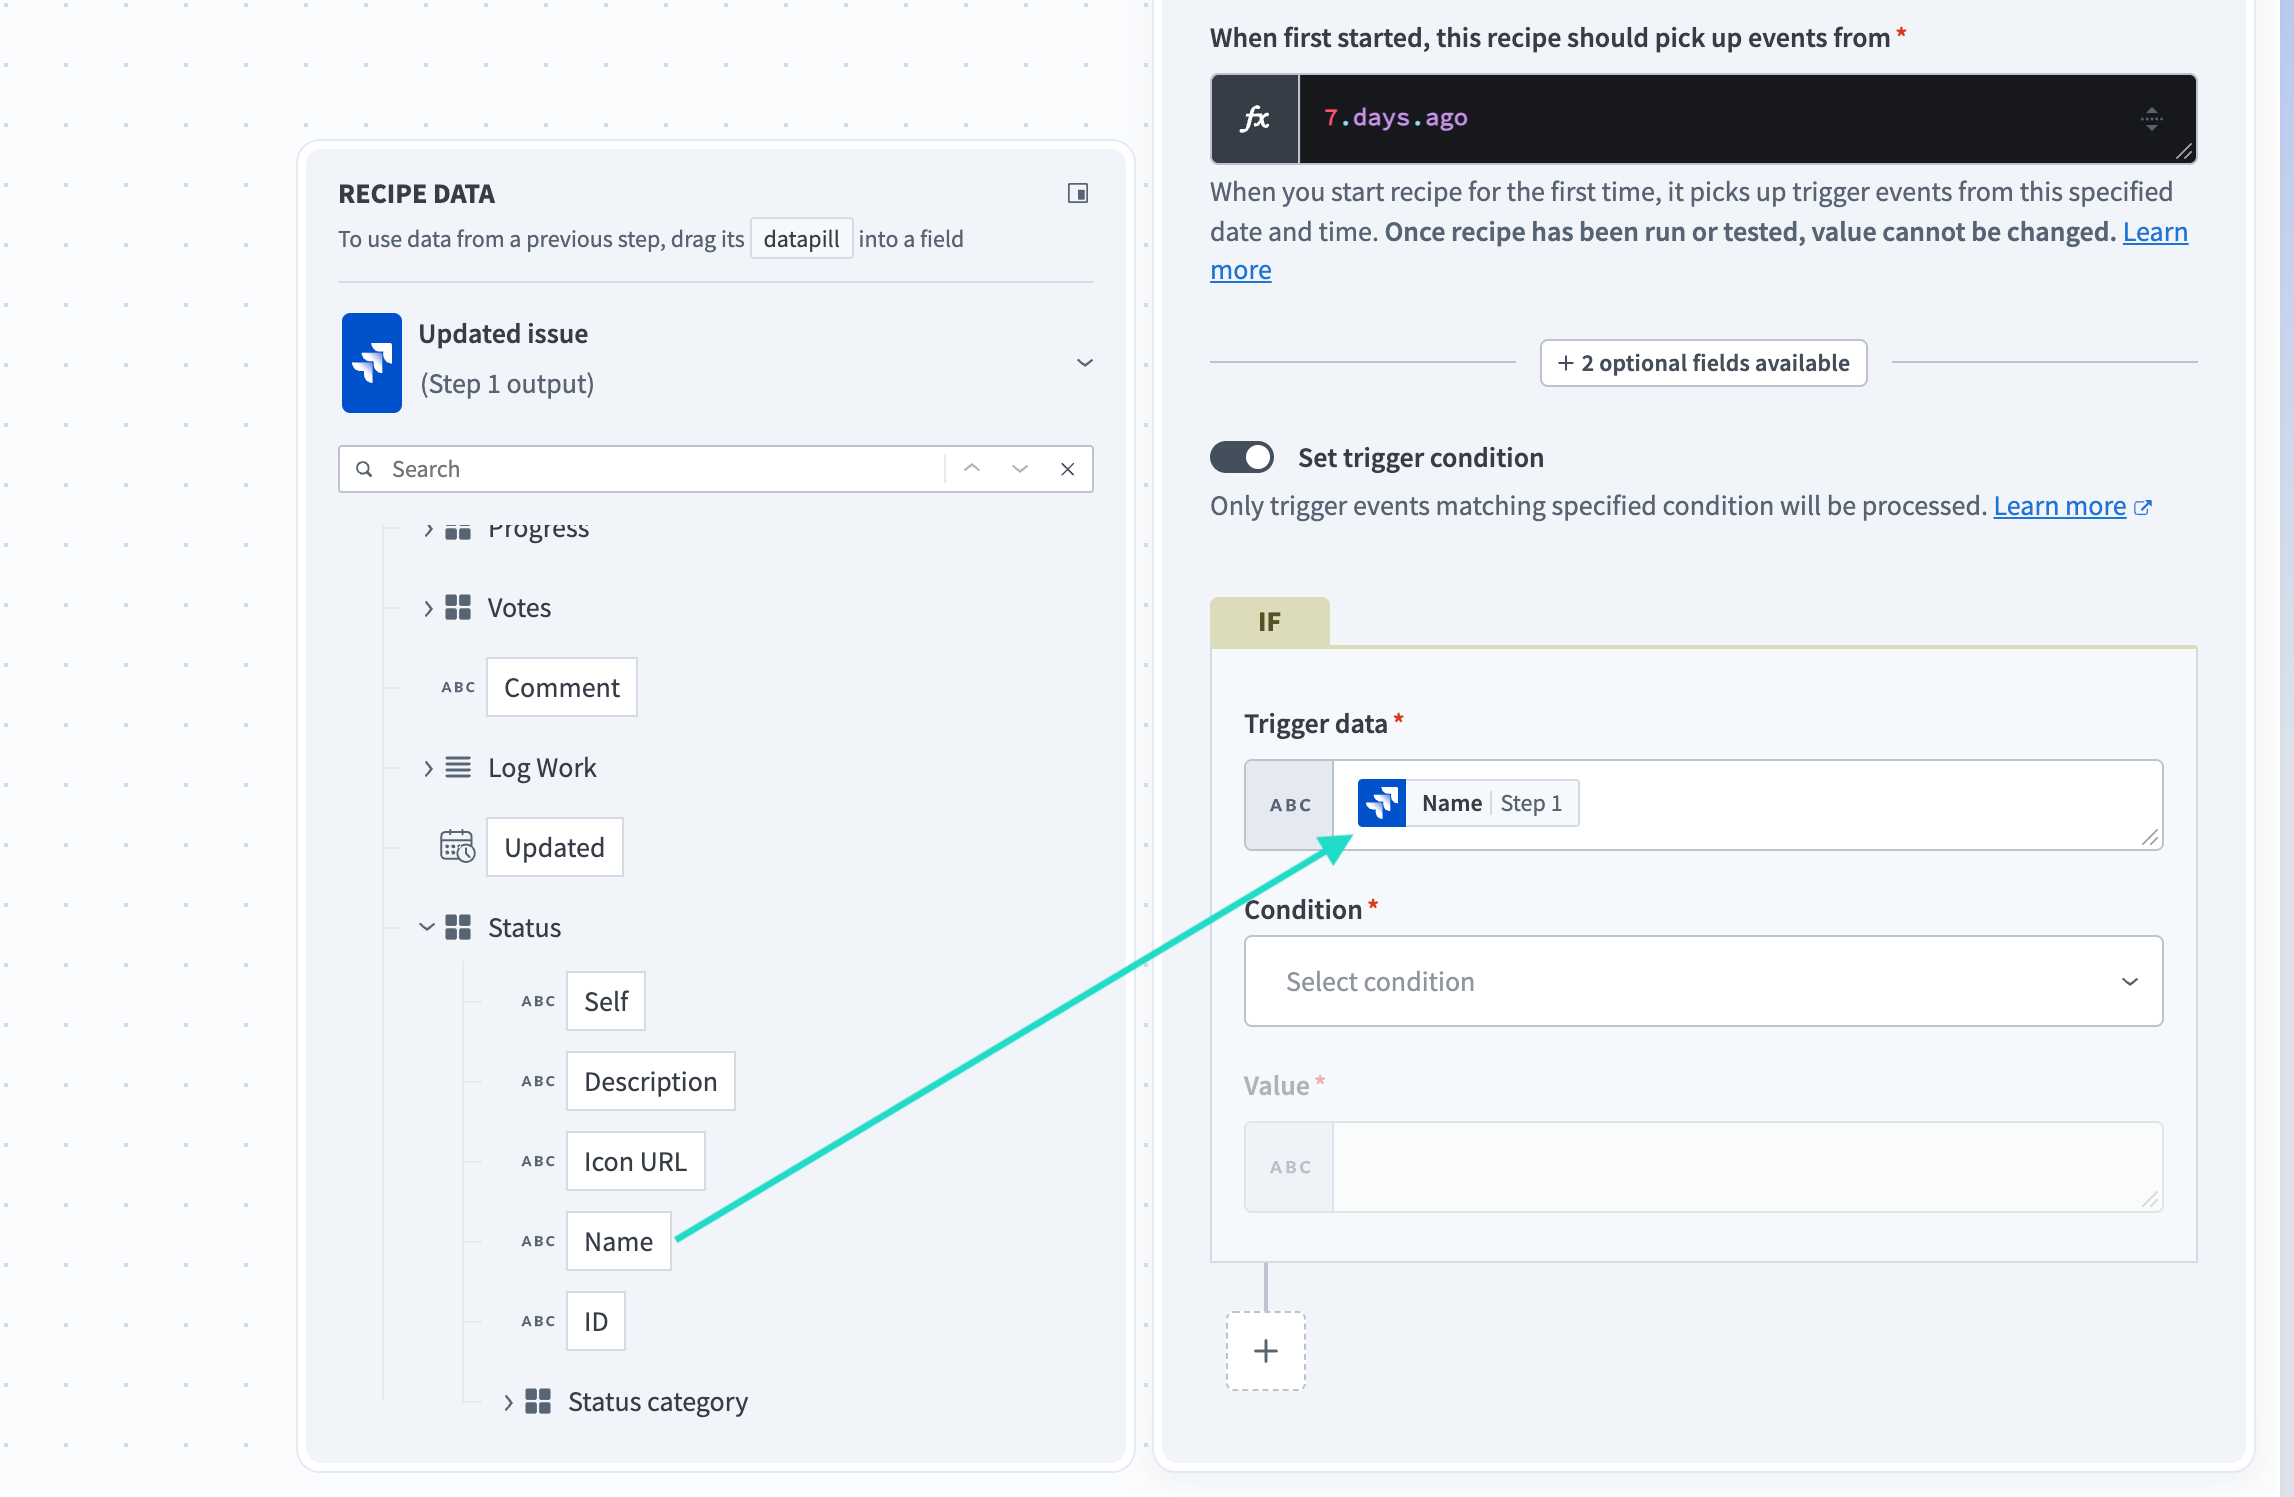
- Map the workflow/status datapill. Operator: equals. Value:
Approved(exact string from Hub, case sensitive). - Optional: add a second condition that the asset must have a non-empty title.
- Save the trigger.
Configure the Slack action
- Under the trigger, click + > Action in an app.
- Select Slack and your
uat-slack-content-opsconnection. - Action: Post message (or Send message to channel).
- Channel: pick
#content-ops-uatfrom the picker. Do not hard-code a raw channel ID unless you document it. - Message text: switch to the editor and insert datapills, for example:
Asset approved: {{Title}}
ID: {{EntityIdentifier}}
By: {{LastModifiedBy}}
Link: {{PublicLink or Hub UI URL}}- If a datapill is missing, expand the Recipe data panel from Step 1 and drill into the entity schema. Do not type field names from memory.
- Click Save.
Test, then start
- Open the Test tab.
- Either wait for a real Approved event or use the connector's test/sample job if offered.
- Confirm Slack received one message with the right title.
- Check job history for success and duration.
- Only then click Start recipe in UAT.
Promotion tip: clone into the production project, swap both connections to prod, change the Slack channel to the prod ops channel, and retest with a single asset. Never start prod with UAT connections still selected.
Recipe 2: Scheduled Salesforce lead to Sitecore item (deep map)
Goal: every 15 minutes, find new Salesforce leads with a campaign tag, and create or update a Sitecore item under a known folder. This is where soft keys clone items. Read carefully.
Create recipe shell
- Create recipe
uat-sfdc-leads-to-xm-prospects. - Starting point: Run on a schedule.
- Scheduler: every 15 minutes. Time zone: the same zone your Salesforce reports use.
- Save.
Step 2 — Search leads
- Add Action in an app > Salesforce > Search records (SOQL or Search, depending on connector).
- Connection:
uat-salesforce-ro-leads. - Object: Lead.
- Filter: Campaign membership or custom field equals your pilot value, and CreatedDate greater than the last successful watermark if you store one. For a first version, use "Created in last 20 minutes" and accept a little overlap.
- Limit: 100.
- Save.
Step 3 — Repeat for each lead
- Add Repeat for each.
- Input list: datapill from Step 2 records collection.
- Inside the loop, add IF: Lead Id is present.
Step 4 — Lookup existing Sitecore item by external id
- Inside the loop, add an HTTP or Sitecore action that queries items where a dedicated field
SalesforceLeadIdequals the Lead Id datapill. - If your tenant has a Sitecore XP/XM connector with Search, use that. Otherwise call your own thin lookup API that reads the mapping table. Do not search by lead name.
- Store "found item id" in a recipe variable.
Step 5 — Create or update
- Add IF condition: found item id is empty.
- THEN Create item under
/sitecore/content/Site/Prospectswith template Prospect. Map:- Title <- Lead Name
- Email <- Email
- SalesforceLeadId <- Id (required, never blank)
- Company <- Company
- ELSE Update item by id. Map only fields you allow to change. Do not clear SalesforceLeadId.
- On both branches, write LastSyncedUtc to now.
Step 6 — Error handler
- Wrap the create/update in Handle errors.
- On error: post Slack to
#integrations-uatwith Lead Id + error message, then continue to next lead (or stop if you prefer fail-fast). - Never return success to the scheduler when the whole batch failed silently.
Why this recipe does not clone
The durable key is SalesforceLeadId, not the Sitecore path and not the person name. Retries and overlapping schedules will hit Update, not Create. If your earlier Connect post about soft keys still haunts you, this is the fix in recipe form.
Recipe 3: Webhook intake with signature check
Goal: receive a partner webhook, verify a shared secret header, then create a ServiceNow incident. Use this when a vendor cannot speak Salesforce or Sitecore natively.
- Create recipe
uat-partner-webhook-snow. - Starting point: Trigger from a webhook.
- Copy the generated webhook URL into the partner portal for UAT only.
- First action: IF header
X-Partner-Signatureequals your secret (compare using the formula mode / Workato formula helpers your tenant supports). If your partner uses HMAC, compute the hash in a formula step; do not compare raw body to the secret. - ELSE stop with an error so the partner sees non-2xx and you do not create tickets for forged calls.
- THEN ServiceNow > Create incident. Map short description and description from JSON datapills.
- Optional: respond with JSON body containing the incident number if you used an API recipe style.
- Test with curl from a locked-down jump box, not from a laptop on public Wi-Fi with the secret in shell history.
curl -X POST "$WEBHOOK_URL" \
  -H "Content-Type: application/json" \
  -H "X-Partner-Signature: $UAT_SECRET" \
  -d '{"title":"UAT ping","detail":"connect recipe check"}'
Datapill mapping cheat sheet
| Situation | Do this | Avoid |
|---|---|---|
| Required field empty at design time | Map a datapill or a typed default | Leaving required fields blank and hoping Test skips them |
| Nested JSON | Expand Recipe data, drill, then drag | Typing Steps[1].foo.bar from memory |
| Need transform | Formula mode on the field | Hidden Excel cleanup before the recipe |
| List of records | Repeat for each | Mapping the whole array into a string field |
| Optional CRM field | Leave blank or map null carefully | Writing literal text "null" |
Ops hardening before production
- One project per environment. One connection naming scheme.
- Job history retention and a weekly review of failed jobs.
- Alert recipe: on any failed job in prod project, Slack + email the on-call alias.
- Document the durable external id for every write into Sitecore.
- Keep a runbook: stop recipe, replay from job id, verify no duplicate item.
- Task budget: watch non-prod fair use so a runaway loop does not burn the month.
Recipe editor habits that save you hours
After a dozen recipes, the same habits show up on healthy projects. I keep this list taped near the monitor when I am mentoring a new integration owner.
- Name every step. Default names like "Create record" are useless in job history at 2 a.m.
- Put the durable key in the step name:
Upsert XM by SalesforceLeadId. - Prefer one write app per recipe when you are learning. Fan-out recipes hide which system failed.
- Keep secrets in Connections or environment properties. Never paste tokens into message text "just for UAT."
- When Test fails, read the step output JSON before you rewrite the map. Half the time the datapill path is one level deeper than you thought.
Workato's recipe editor (the same canvas Sitecore Connect uses) lets you add steps from the canvas plus menu or from the toolbar. Configure the selected step in the side panel, then save. Use the Test view to run a controlled job and inspect each step's input and output. That Test habit is the difference between "it worked on my machine" and a recipe you will start on Monday.
IF conditions, stop rules, and when to call a function recipe
Inline IF blocks are fine for one or two checks. When you start nesting IF inside Repeat inside Handle errors, extract a Recipe function (callable recipe) for the upsert logic. The parent stays readable: search, loop, call function, alert.
- Create a new recipe with starting point Build recipe function.
- Define input parameters: LeadId, Email, Name, Company.
- Move the lookup/create/update steps into that function.
- From the parent, add Call recipe function and map the loop datapills into those parameters.
- Return the Sitecore item id to the parent for logging.
Stop rules matter. If Salesforce returns zero leads, stop cleanly. If lookup returns two items for one Lead Id, that is data corruption: stop, alert, and do not update either item until a human merges them.
Monitoring and the Monday morning review
Connect gives you job history and project dashboards. Use them. Every Monday I scan production failed jobs first, then long-running jobs, then recipes that show zero runs when they should have fired.
- Failed job: open the step error, fix map or connection, replay only if the durable key check still holds.
- Zero runs on a schedule: confirm the recipe is Started, not just Saved.
- Spike in task count: look for a loop that searches too wide or a webhook retry storm.
Pair this with the idempotency patterns from earlier Field Notes on Connect retries. Recipes give you the canvas. Durable keys give you sleep.
When not to use a recipe
I push teams to recipes for SaaS glue. I push them away when the requirement is a hard transactional boundary across Sitecore and a payment system, when sub-second user-facing APIs need consistent latency, or when the security team forbids a low-code runtime from holding production credentials. In those cases, keep Connect for notifications and use a service you own for the write path.
Further reading
- Sitecore Connect introduction (doc.sitecore.com/connect)
- Workato: build your first recipe
- Workato: datapills and field mapping
- Sitecore Connect for Content Hub (CMP/DAM) when you need that path instead
Actionable checklist
- Split UAT and prod Connect projects and connections
- Name connections with env + system + purpose
- Ship Recipe 1 (Hub to Slack) before any Sitecore write
- Put a durable external id on every Sitecore create/update recipe
- Add Handle errors + Slack on every write recipe
- Test with one real record, then start; clone to prod with connection swap
- Review failed jobs weekly and keep a replay runbook